-
Upcoming
Live Online Workshops -
Ongoing Series
-
Authors
-
SharePoint Resources
- Bits of SharePoint
- Codeless Solutions for SharePoint
- Get the Point
- Innovation Matters
- Path to SharePoint
- Paul Galvin
- SharePoint 911
- SharePoint Blank
- SharePoint Blogs at SharePointU
- SharePoint for Non-Developers
- SharePoint Forums at SharePointU
- SharePoint Screencasts
- SharePoint Use Cases
- Social Media Talk Tweets
- The Sanity Point
- The Weekly Newsletter

| Weekly Newsletter Signup |
Sep
28
Creating mailing lists for SharePoint sites and blogs [No Code Required] – Part 2: Creating a custom subscription form
 Guest Author: Ayman El-Hattab
This is the second article in a multipart series that is intended to help you create mailing lists for your SharePoint sites or blogs without writing a single line of .NET Code. In the introductory article, I listed the project initiatives, requirements, and objectives. In Part 1, I created a secured backend where we store the subscribers’ contacts. In this article, we will continue our journey, let’s carry on!
In the previous article, I made use of the ‘Contacts’ list template, provided out-of-the-box by SharePoint, to create a list which will act as the backend for our mailing list. In this article, I will show you how to configure the ‘Contact’ content type, create a custom subscription form and do some sort of customization. The intention of these customizations is not only to make the subscription form look different from the out-of-the-box list forms but also to show you the power, simplicity, and efficiency of SharePoint Designer 2007.
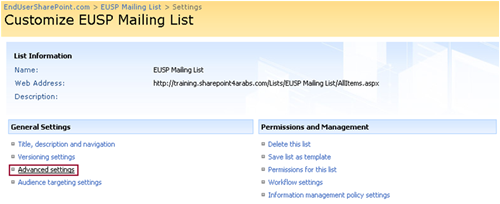
- Navigate to the list settings page > Advanced settings.
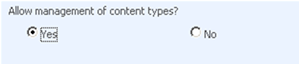
- Make sure that management of content types is turned on.
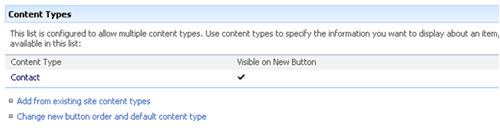
- Navigate to the contact content type settings page from the list settings as shown underneath:
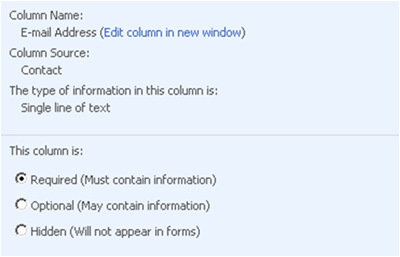
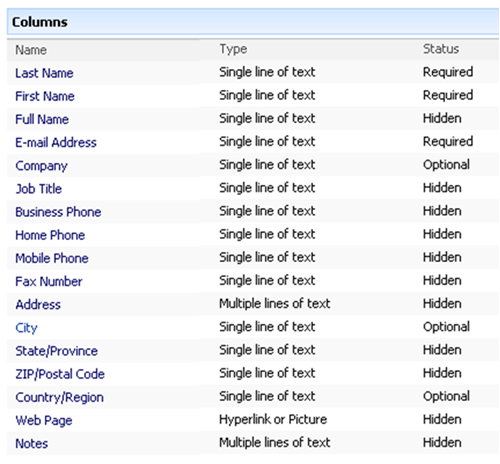
- Configure the content type fields from the content type settings page. We need a list subscriber to mandatorily supply their first name, last name and e-mail address and optionally supply their Company, City and Country.
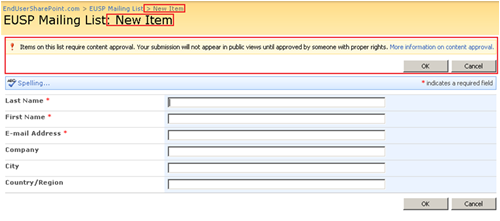
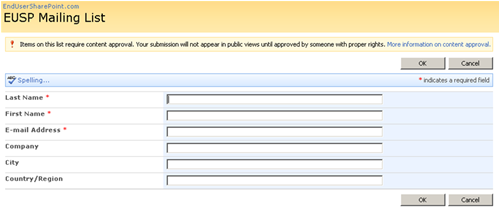
- Now, navigate to the New Form (NewForm.aspx) by adding a new contact to the list as follows :
- As shown in the figure above we need to get rid of the highlighted areas. I will show you in this article, and the next one how, to accomplish that.
- Open up SharePoint Designer, connect to your SharePoint site collection, and supply your credentials.
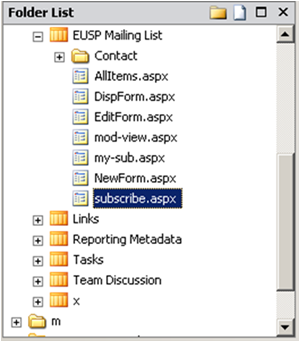
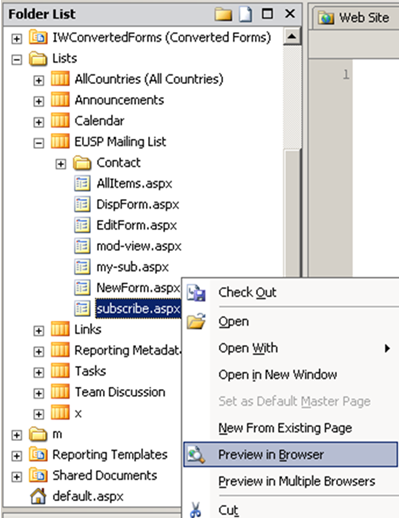
- Choose the list that we created in the previous article from the folder list. If the Folder List is not visible, on the View menu, click Folder List.
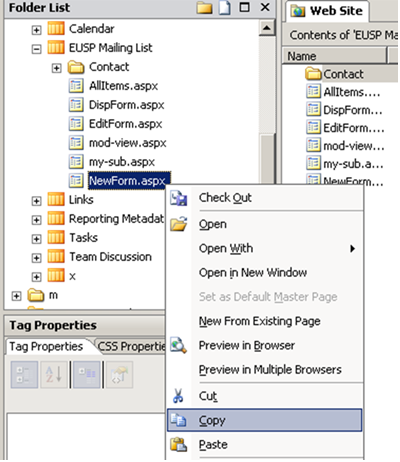
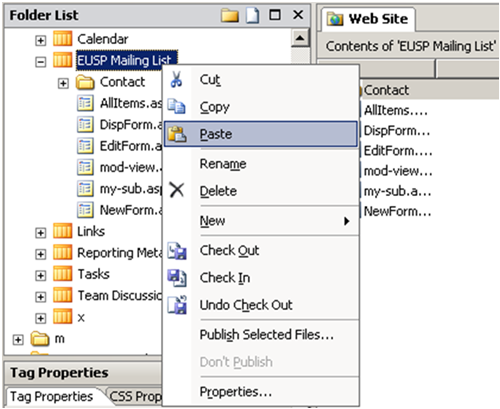
- Make a copy from the NewForm.aspx and rename the copied version from NewForm_copy(1).aspx to subscribe.aspx as follows:
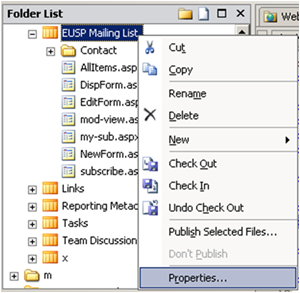
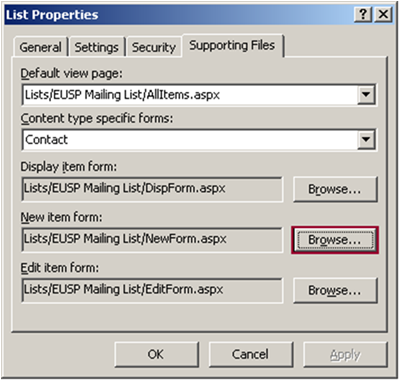
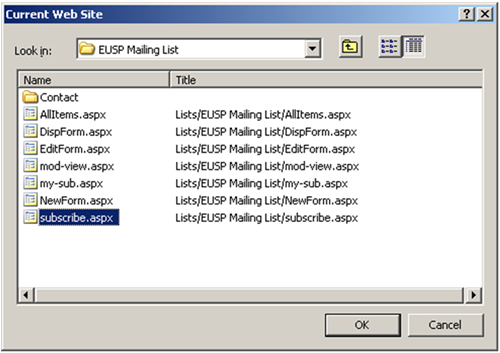
- Change the list New item form from NewForm.aspx to subscribe.aspx using the supporting files tab of the list properties’ dialogue box as illustrated below:
- Now choosing to add a new contact to the list will redirect you to subscribe.aspx rather than NewForm.aspx.
- Our next task is to modify the newly created form (subscribe.aspx) to look like a mailing list subscription form rather than the traditional SharePoint list forms.
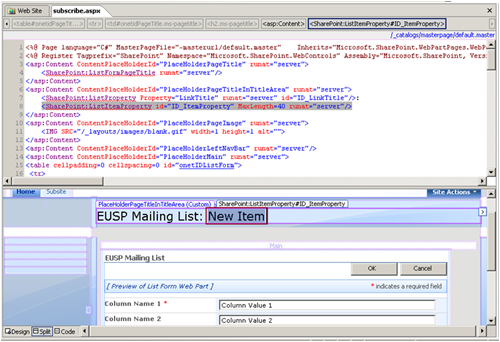
- Open subscribe.aspx using SharePoint designer.
- Select “New Item” highlighted in the figure below. Delete it with the colon preceding it.
- Now, we need to eliminate the “New Item” from the form breadcrumb.
15.1. Select the “PlaceHolderTitleBreadcrumb” placeholder from the Master Page toolbar as shown in the figure below.
- To change the page title “IE Tab title”, locate the ”PlaceHolderPageTitle” placeholder using the Master Page toolbar discussed above and replace the ListFormPageTitle control with your own title.
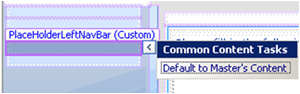
- Now, we are in a good shape; only one non-compulsory step is left which is adding the left navigation bar back to the page. Note the word (Custom) on the content placeholder tab. This means that the content is custom content for this page only, and that it is not retrieved from the attached master page. Nevertheless, we do not need any custom content for this page. We need to retrieve the left navigation menu from the master page so the only thing we need to do is defaulting the region to the master’s content using the Common Content Tasks as shown in the figure below.
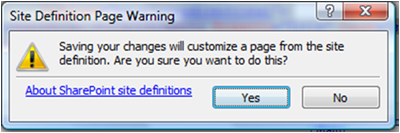
- Save your changes by clicking Save on the File menu. A message appears warning you that saving your changes will customize a page from the site definition. Click Yes.
- And here is what you will end up with, if you follow the preceding steps.


Note: You can show this toolbar if it is hidden from View menu > Toolbars.
15.2. The word (Master) on the content placeholder tab means that the content is retrieved from the master page. To make this content region editable to override the retrieved data, click the arrow in the upper-right corner to show the Common Content Tasks list, and then click Create Custom Content as shown in the figure below. This will automatically create a new content region that will fill the placeholder in this page rather than using the Master’s default content.

15.3. Replace the SiteMapPath control with a link to the site collection’s welcome page. You can use the handy “SPLinkButton” control in conjunction with “ProjectProperty” control to accomplish that as shown below. The good thing about SPLinkButton is that it is aware of ~site and ~sitecollection expression tokens.


Note: If you are not pleased with the customizations that you have made to the page, you can always reset it to the site definition.
Summary:
In this article, I showed you how to configure the ‘Contact’ list content type, create a subscription form for the mailing list, make it the default New Item Form and do some simple customizations to it.
In the next article, I will show you how to customize the form fields, use the extremely powerful DataFormWebPart, change the form validation mechanism to be client sided, add your own validation logic, configure the SPDataSource control and much more ..
 Guest Author: Ayman El-Hattab
Ayman El-Hattab is a SharePoint Developer & Speaker. He is a Microsoft Certified Solution Developer as well as a Microsoft Certified Technology Specialist in SharePoint. Ayman writes articles about topics in relation to SharePoint and its related technologies for online magazines, publicly speaks for numerous user groups and offline communities, is the founder of SharePoint4Arabs.com, organizes events for EGYSUG and you will always find him active at MSDN and Technet forums.
Articles in this series
- Creating mailing lists for SharePoint sites and blogs [No Code Required] - Part 2: Creating a custom subscription form
- Creating mailing lists for SharePoint sites and blogs [No Code Required] – Part 1: Creating a secured backend
- Creating mailing lists for SharePoint sites and blogs [No Code Required] – Introduction