Adding pictures with hyperlinks in SharePoint
 Guest Author: Sherri Amstutz
Accelerated Knowledge
The example that follows uses a Content Editor Web Part (CEWP) however, this practice can be used in any SharePoint Web Part that allows you to Edit HTML source using the icon in the Rich Text Editor (see below).
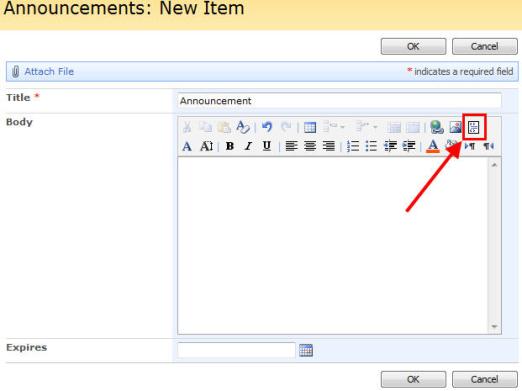
A short list of standard SharePoint Web Parts that include a text area that has the “Edit HTML Source” option by default are:
- Announcements
- Discussion Board
- Events
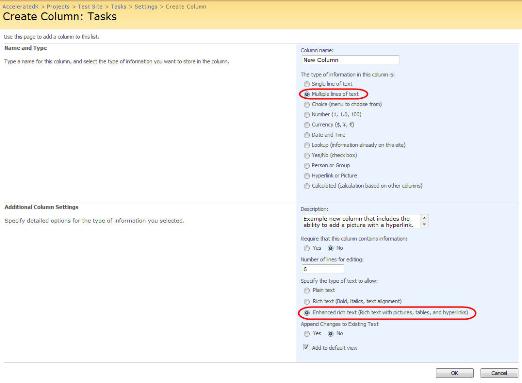
You can also add a text area that includes the Edit HTML Source option to a standard SharePoint Web Part by creating a new Multiple lines of text column, then selecting Enhanced rich text in the Additional Column Settings section as shown below.
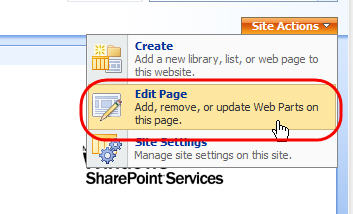
Start the process by navigating to the site page where you want to add the hyperlinked image and add a CEWP. Click Site Actions then Edit Page.
Click Add a Web Part in the section of the page where you want to add the clickable image.
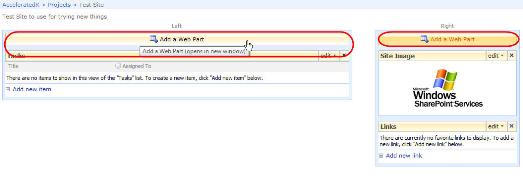
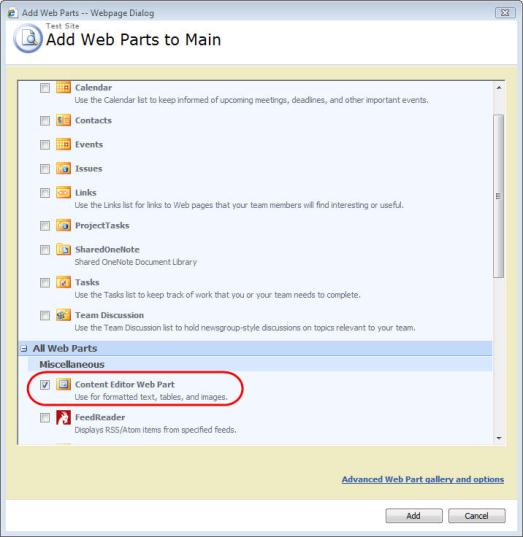
Select Content Editor Web Part in the Add Web Parts dialog and click Add.
The CEWP will be added to the page. Leave this page open in your browser and open a new browser window or tab to upload the image you want to use.
Navigate to a Picture Library or create one if it doesn’t already exist. To create a Picture Library click Site Actions, Create, then select Picture Library, complete the form presented and click Create.
Recommended practice 1:
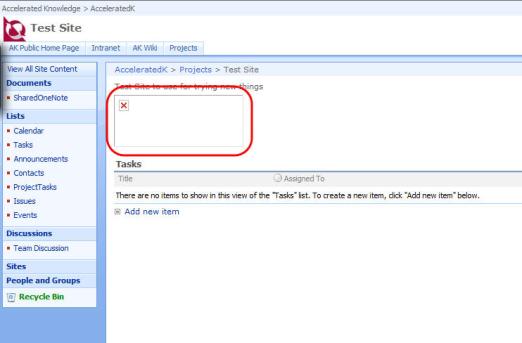
For sites that utilize unique security settings (e.g. project sites) my habit is to create a Picture Library for site images within the site itself. I don’t add a link to it on the Quick Launch because the only purpose is to use the library for images that will be displayed on the site. Creating this Library within each site prevents the problem of site images that are not visible to users. This happens when images are uploaded in a site that users do not have access to but are referenced in a site that the user does have access to. If this happens the image will show up like this:
Upload the picture(s) you want to use by clicking Upload, then Browse to the picture, once it is selected and the path appears in the Name: box, click OK to begin the upload.
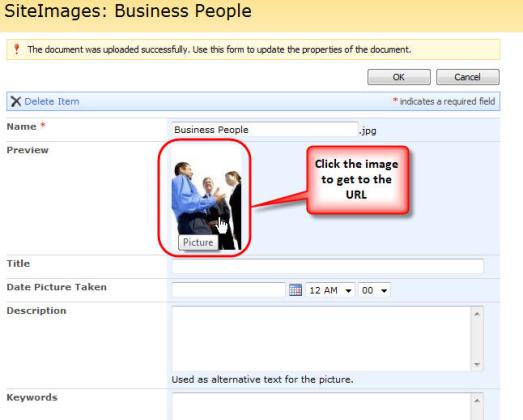
After the picture uploads, complete any information you want to capture about the image in the properties form and click the picture to navigate to the URL for the image.
Copy the URL to your clipboard by selecting the URL and right clicking it in the address area of your browser then clicking Copy.

Click the browser Back arrow or Back button to return to the previous page, then click OK to close the Image Properties page.
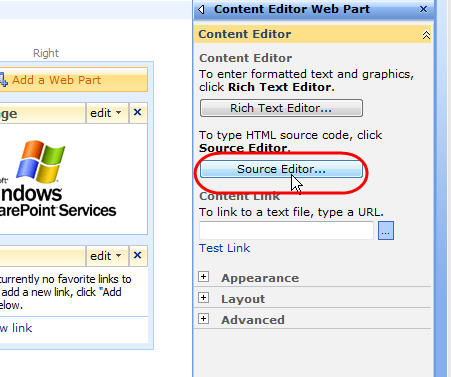
Navigate back to the page where you added the CEWP. Click open the tool pane, then click Source Editor…

The devil is in the details on making a picture usable as a hyperlink. I started by trying to use the Rich Text Editor…, adding the picture and trying to use the Hyperlink option to make it a link. It didn’t work. I then tried typing HTML commands in a variety of ways using the Source Editor…, but I couldn’t get that to work either. I was pretty sure I didn’t have the syntax right so I asked one of my technical guru friends (Pam Davis http://padavis.wordpress.com/) for the syntax I needed. What follows came from her expert advice.
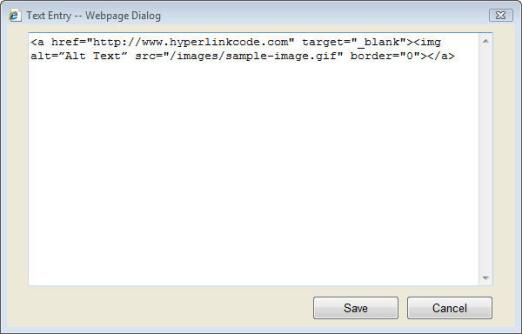
Add HTML code to the Source Editor… with the following syntax to make your picture a hyperlink:
<a href="http://www.hyperlinkcode.com" target="_blank"><img alt=”Alt Text” src="/images/sample-image.gif" border="0"></a>
Replace the http://www.hyperlinkcode.com with the link to the site you want the picture to take your users to.
Replace the img src=”/images/sample-image.gif” with the URL you copied into your clipboard in the steps above.
Recommended practice 2:
You may notice that the image link shown in this sample text above represents the shortest possible link to the image. This is referred to as a “relative” link. I try to use relative links in SharePoint where possible so that if the location of the site changes or other changes happen the link to the image won’t break. If you make your link relative and the image does not appear, you may have shortened the link too much. You can always include the entire link starting with “http://” to make the image visible.
The target=”_blank” setting opens a new browser window when your users click the picture. If you want the link to open in the existing browser, remove this text.
The alt=”Alt Text” setting is used to create rollover text for your picture. If you do not want rollover text, remove this.
The border=”0” setting will not create a border around the image. Experiment with adding border=1 to see the border created around the image.
Click Save. The image will appear and when clicked, will take users to the website URL entered above.
Guest Author: Sherri Amstutz
Accelerated Knowledge
Sherri Amstutz has a wealth of experience in strategy, learning, and complex project management. She has served clients in a number of vertical markets including financial services, software development, education, distribution, and manufacturing. Sherrihas delivered implementation consulting and training for numerous SharePoint projects including an early-adopter who was featured at Microsoft’s Office 2007 kickoff event in Atlanta, Georgia. Ms. Amstutz’s education includes a BBA from Grand Valley State University and a MBA from Western Michigan University. She was certified as a CPA early in her career and is the sole owner of Accelerated Knowledge (www.acceleratedk.com).


The trick to create a picture hyperlink is to create a text hyperlink, then replace the text with the picture. It is explained here:
http://sharepoint.microsoft.com/blogs/GetThePoint/Lists/Posts/Post.aspx?ID=118
You can grab pictures much more efficiently if you change the view of your picture library to a Preview Pane view (Modify View>Style>Preview Pane). No need to display a bunch of columns you don’t need to see for simply grabbing URLs, I keep just the default, name (with edit), and a thumbnail. Now a quick scan of the list, and mouse over will verify the picture you want to grab, which you can do with a right click and “copy shortcut”. If you build training material and include pictures, that trick will save you a tremendous amount of time. And, if you are just starting out, label your pictures well (AndLeaveOutSpaces.gif), you will be happy later!
I agree with Christophe, that way is a lot more efficient.