Creating mailing lists for SharePoint sites and blogs [No Code Required] – Part 4: Creating the Country lookup elements
 This is the fourth article in a multipart series that is intended to help you create mailing lists for your SharePoint sites or blogs without writing a single line of .NET Code. In the introductory article, I listed the project initiatives, requirements, and objectives. In Part 1, I created a secured backend where we will store the subscribers’ contacts. In Part 2, I configured the ‘Contact’ content type, created a subscription form for the mailing list and did some simple customizations to it. In Part 3, I utilized the thrilling DataFormWebPart to further extend and enhance the subscription form to meet the project requirements.
In the previous article, I promised to tackle a new area, which is “SharePoint Designer Workflows”. However, while writing the promised article, I received some e-mails, from followers of this series, asking about the country lookup feature I mentioned in the project requirements.
“When filling out the form, users should select their countries from a drop down list, which holds all the countries of the world.”
I found a zillion of articles throughout the web covering the “lookup fields” and “lookup lists” topics into enough depth and listing their gotchas and limitations. However, I will provide you with some steps, tips, and free stuff that you will definitely need to implement this requirement. To make this article more useful, I will also explain some other topics during the implementation like List Templates and SharePoint field type conversions. I’ll show you how to modify the FormField Controls and how to mark a list as invisible using SharePoint Designer.
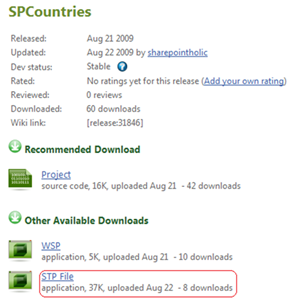
- Navigate to SPCountries Feature page at CodePlex and download the Countries List Template as shown below:
- Upload the list template ( stp file) you just downloaded to the “List Template Gallery” and create the countries lookup list based on this template. Note: refer to the following article if you are new to this topic.
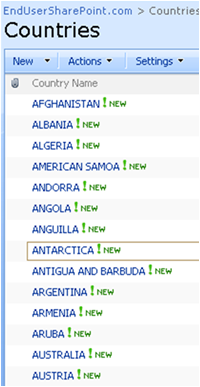
http://office.microsoft.com/en-us/sharepointtechnology/HA100991561033.aspx - After following the steps provided by the article, you should have a SharePoint list that contains all the countries of the world like the one shown below:
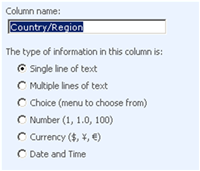
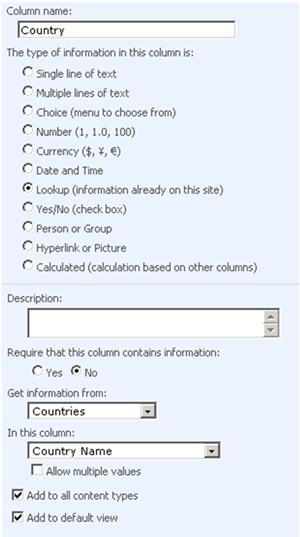
- Now, you need to change the “Country/Region” field type to “Lookup (information already on this site)” rather than “Single line of text” to gets its values from the “Countries” list you just created.
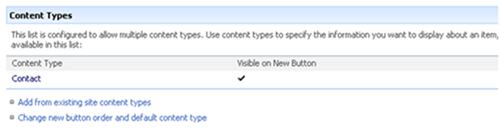
- Navigate to the Contact content type settings page from the list settings one.
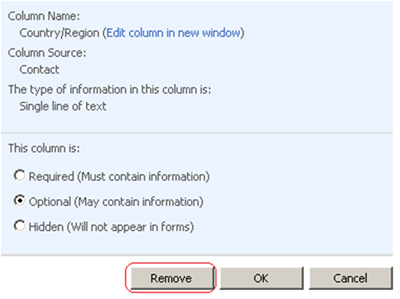
- Oops! You cannot modify the “Country/Region” field to be a lookup one! Yes, this is not supported by design, for a list of supported SharePoint field type conversions, refer to this article.
- For the sake of simplicity, I will just delete the default “Country/Region” column and replace it with a new lookup one as shown below.
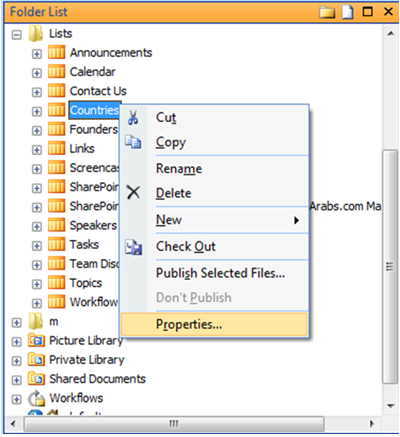
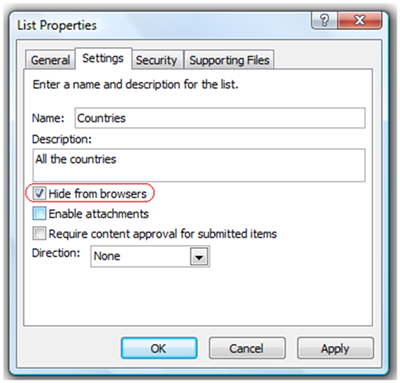
- To mark the “Countries” lookup list as invisible (Only the list and not the included content, which should be available to all the site users including anonymous ones), open up SharePoint Designer, supply your credentials, and follow the steps illustrated by the following figures.
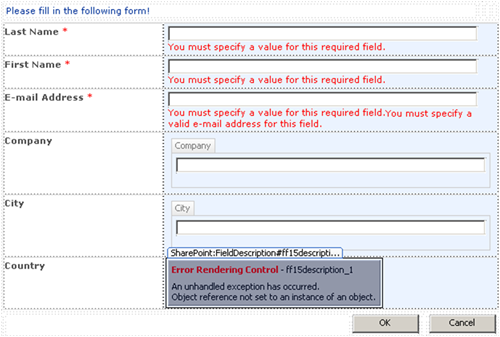
- Open the custom subscription form. Unsurprisingly, you will get an error like the one shown below.
- The reason I have received this error is that I’ve modified the list fields and some form fields are still looking at the deleted country field. To fix this error, modify the FieldName attribute values of the FormField and FieldDescription controls to be “Country” instead of “WorkCountry” or you can just use Find and Replace to achieve the same result.
- Save your form, the error is gone
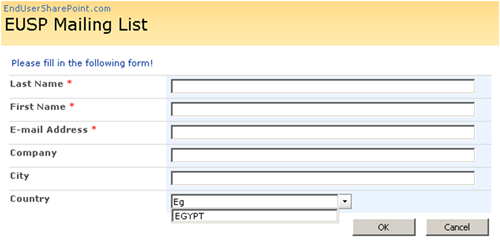
- Preview your form from the browser and there you go; now you have a list with a form analogous to the one I have shown you in the introductory article… Congratulations!
Note: Do not forget to allow anonymous access to this list as I showed you in the first article.

Note: You can write a simple script that utilizes SharePoint/Office Live javascript API to perform this conversion, refer to this interesting article for more information.


Community Feedback
Since the kick-off of this series, I have received amazing feedback from EUSP visitors and my blog followers. I would like to extend a special thank-you to everyone who took time to drop me an e-mail, follow me on twitter, or even leave me a comment. Your feedback means a lot to me.
I noticed that most of the questions that I have received lately focused on the sixth requirement. For easier reference, I have copied it below.
“List administrators should be able to send e-mails to all the approved and registered users specifying some filters. For instance, the list administrator should be capable of sending e-mails to all the registered users from Canada”.
Starting with the next article, I will explain how to implement this requirement, which will involve the creation of primary and secondary workflows, integrate SharePoint lists with Microsoft Outlook and Microsoft Word 2007.
As I told you in the beginning of this article, I had already started writing about SharePoint Designer Workflows before I received questions about the lookup fields and lists. When I was doing a research to avoid writing what has already been written, and to elaborate where others are vague or incomplete, I stumbled upon a great article by Paul Galvin titled “Email and SharePoint Designer Workflow” which provides a deep explanation to what I was about to cover.
Therefore, if you are new to SharePoint Designer workflows, I would encourage you to have a look at this article. So you’ll be ready for my next post which will directly start creating and implementing the needed workflows without discussing what was smartly discussed by Paul as I am not a fan of reinventing the wheel.
So until I talk to you again, check out my blog at http://www.aymanelhattab.com , where you will find shorter articles, tips and tricks, questions and answers, and downloadable content. You can also follow me on Twitter http://www.twitter.com/aymanelhattab or drop me an e-mail at [email protected] if you have any questions.
 Guest Author: Ayman El-Hattab
Ayman El-Hattab is a SharePoint Developer & Speaker. He is a Microsoft Certified Solution Developer as well as a Microsoft Certified Technology Specialist in SharePoint. Ayman writes articles about topics in relation to SharePoint and its related technologies for online magazines, publicly speaks for numerous user groups and offline communities, is the founder of SharePoint4Arabs.com, organizes events for EGYSUG and you will always find him active at MSDN and Technet forums.
- Creating mailing lists for SharePoint sites and blogs [No Code Required] – Introduction
- Creating mailing lists for SharePoint sites and blogs [No Code Required] – Part 1: Creating a secured backend
- Creating mailing lists for SharePoint sites and blogs [No Code Required] - Part 2: Creating a custom subscription form
- Creating mailing lists for SharePoint sites and blogs [No Code Required] - Part 3 : More Customizations to the subscription form using DataFormWebPart
- Creating mailing lists for SharePoint sites and blogs [No Code Required] – Part 4: Creating the Country lookup elements
- Creating mailing lists for SharePoint sites and blogs [No Code Required] – Part 5: Creating the primary and secondary workflows and connecting to outlook
- Creating mailing lists for SharePoint sites and blogs [No Code Required] – Part 6: Administering the mailing list using Microsoft Word Mail Merge