
SharePoint: Extending the DVWP – Part 19: User-Managed Dropdowns – Loading the Relationship list – Part 2
 Author: Jim Bob Howard
So, you’ve been following along as we’ve created site columns, loaded the column data, created a relationship list, and loaded the relationship lists. But you really want to use the Title column in the relationship list to make it easier to maintain later. I don’t blame you, especially if it’s something that is likely to change or have new entries in the future.
Two options that might seem to make the job easier are:
- A workflow that concatenates the parent and child data into the Title when the item is created.
- Another "obvious" option would be to create a Calculated column in the datasheet view that would immediately concatenate the two. We could then copy/paste the entire column into the Title field.
Problem: This method won’t let us load the data with a large copy/paste action for multiple rows (like we did in the last article) because when the row is "created" it will be without one of the pieces of data. So an "on create" workflow won’t work. An "on change" workflow would require us to check to see if the Title is what it should be and changing it if not, which would also trigger the change workflow. This could hang the server until you kill the workflow.
Obviously, this would not work for the initial load. But, it could work "on create" for future one-at-a-time adds, especially if you made the parent and child required (which they should be, in theory, anyway).
Problem: Lookup columns aren’t visible to the Calculated column.
But, we can use this same idea using Excel instead.
Which is what we’ll cover in this article.
A More Excellent Way
Launch Excel and we’ll find an easy way to load our relationships list.
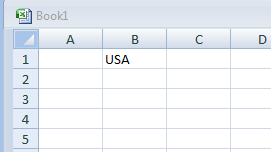
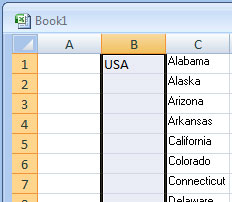
- On a new spreadsheet, enter the first parent in the first cell of the B column.
- Toggle to your child list, select all of entries for the first parent, and copy the list with Ctrl-C
- Toggle back to Excel and paste this list into the C column with Ctrl-V
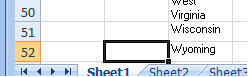
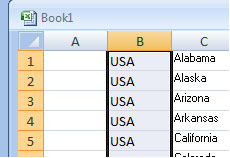
- Go to the bottom of the child list (press Ctrl – Down arrow)
- Move the focus over one column to the left with the left arrow
- Holding the Ctrl and Shift keys, press the up arrow to select the column up to the first cell that contains data
- Press Ctrl-D to fill down
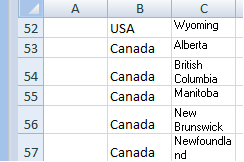
- Repeat with other Parent/Child lists
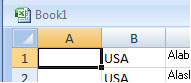
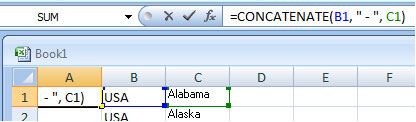
- Move to cell A1 in Excel
- In the fx window, enter =CONCATENATE(B1, " – ", C1)
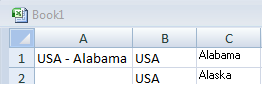
- Press Enter and the A column will now have a ‘title’ made up of the parent and child.
- With your cursor in the B or C column, press Ctrl – Down arrow to go to the bottom of the entered data. Then move left to the A column.
- Holding Ctrl and Shift, press the up arrow to select all of the empty cells and the first one above this with data (which will be A1, in this case).
- Press Ctrl-D to fill the formula down
- Click once on A1. Holding Ctrl and Shift, press the right arrow, then the down arrow. Press Ctrl-C to copy all of the data.
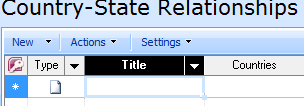
- Toggle back to the relationship list and click once on the first Title cell (the cursor should NOT be seen, just the outline).
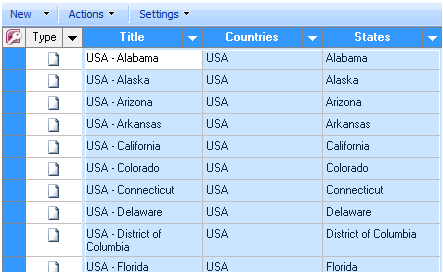
- Paste in the entire relationship list data with Ctrl-V
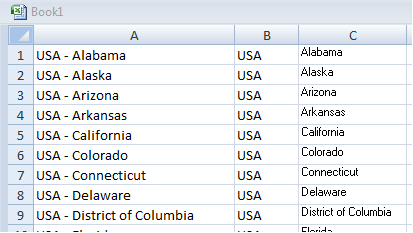
Set up the data in Excel in the same order as the datasheet view of your list
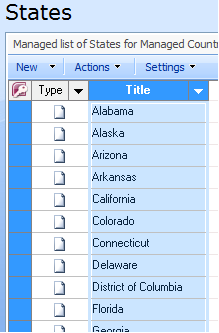
Select all of the child items for the first parent
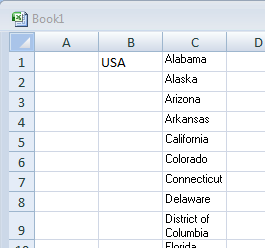
Paste children into C column
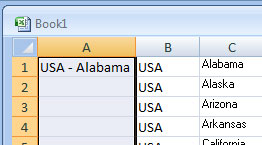
Formula filled down so all records have a descriptive Title
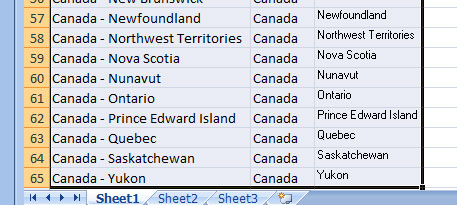
Topmost cell selected
Bring on the Cascades
Whether you used this method or the one from the last article, we’re now ready to bring in the jQuery to make our controls cascade, which I’ll cover in the next installment of Extending the DVWP.
Author: Jim Bob Howard
Jim Bob Howard is a web designer / webmaster in the healthcare industry. He has been working with SharePoint since March 2009 and enjoys sharing what he has learned. He is a moderator and frequent contributor to Stump the Panel, and answers SharePoint questions on Twitter (@jbhoward) and via email ([email protected]).
- SharePoint: Extending the DVWP - Part 1: Layout Enhancement - Rearranging Columns - Default and Edit Templates
- SharePoint: Extending the DVWP - Part 2: Layout Enhancement - Rearranging Columns - Insert Template
- SharePoint: Extending the DVWP – Part 3: Getting it All on One Line - DVWP Function Action Links
- SharePoint: Extending the DVWP – Part 4: Turning DVWP Action Links into Buttons
- SharePoint: Extending the DVWP – Part 5: Doing Stuff Before Save on Submit - PreSaveAction()
- SharePoint: Extending the DVWP – Part 6: Examining the Form Action Links
- SharePoint: Extending the DVWP – Part 7: Creating a Form Action Workflow
- SharePoint: Extending the DVWP – Part 8: Creating a Form Action Workflow - The After Math
- SharePoint: Extending the DVWP – Part 9: Oops! Failed Setting Processor Stylesheet
- SharePoint: Extending the DVWP – Part 10: Passing Workflow Variables to a Form Action Workflow
- SharePoint: Extending the DVWP – Part 11: Getting More Form Fields to the Workflow
- SharePoint: Extending the DVWP – Part 12: Adding More Form Fields from the Data
- SharePoint: Extending the DVWP – Part 13: Putting PreSaveAction() to Work – Creating Variables
- SharePoint: Extending the DVWP – Part 14: Putting PreSaveAction() to Work with jQuery
- SharePoint: Extending the DVWP – Part 15: User-Managed Dropdowns with Site Columns
- SharePoint: Extending the DVWP – Part 16: User-Managed Dropdowns - Loading Data
- SharePoint: Extending the DVWP – Part 17: User-Managed Dropdowns – Creating a Relationship list
- SharePoint: Extending the DVWP – Part 18: User-Managed Dropdowns – Loading the Relationship list – Part 1
- SharePoint: Extending the DVWP – Part 19: User-Managed Dropdowns – Loading the Relationship list – Part 2
- SharePoint: Extending the DVWP – Part 20: Cascading Dropdowns - Applying the jQuery
- SharePoint: Extending the DVWP – Part 21: Cascading Dropdowns - Three-tier Cascade
- SharePoint: Extending the DVWP – Part 22: Creating Title Based on Other Fields with jQuery
- SharePoint: Extending the DVWP – Part 23: Creating Title Based on Other Fields with a Workflow
- SharePoint: Extending the DVWP – Part 24: A Note to Readers
- SharePoint: Extending the DVWP – Part 25: Using an Audit Trail by Creating List Items with SPServices
- SharePoint: Extending the DVWP – Part 26: Modifying the Edit Template
- SharePoint: Extending the DVWP – Part 27: Adding an Alternate Edit Template to a DVWP
- SharePoint: Extending the DVWP – Part 28: Massage the Remove Template
- SharePoint: Extending the DVWP – Part 29: Modifying Form Action Workflows on the remove Template
- SharePoint: Extending the DVWP – Part 30: Using EasyTabs with Filtered DVWPs to Make Data Manageable
- SharePoint: Extending the DVWP – Part 31: Filling in Default Data on the insert Template with jQuery
- SharePoint: Extending the DVWP – Part 32: Filling in Default Data on the insert Template with Multiple DVWPs
- SharePoint: Extending the DVWP – Part 33: Modifying Total and Subtotal Row Layouts in DVWP
- SharePoint: Extending the DVWP – Part 34: Using Icons for Form Action Links
- SharePoint: Extending the DVWP – Part 35: Putting it All Together
- SharePoint: Extending the DVWP – Bonus: Fixing the Insert Form Action When "No Matching Items"
- SharePoint: Extending the DVWP – Bonus: Creating a Title Based on Dropdowns with jQuery


I’m not sure if I can wait for next week for the next installment! :) I’m on vacation so I guess I’ll have to get my deadline pushed back so I have all the pieces.
Great series – very easy to understand!
Jim Bob, useful as this is, I’m beginning to question why it was part of a series entitled extending the DVWP… Its been about 5 installments since the DVWP was even mentioned. Would it not have been better to start another series, particularly given the fairly advanced content that was being talked about around articles 13-14?
Keep up the good work though :).
Nathan, I understand you questioning it. I did, too, when I originally broke it all out this way. ;) The object is to deliver the content in bite-size pieces that are easily digestible.
But, we’re also heading somewhere with all of this and even the easier pieces that pertain to topics that are not DVWP-specific will be brought into the final solution I mentioned in the comments on Part 8: http://www.endusersharepoint.com/2010/06/08/sharepoint-extending-the-dvwp-%e2%80%93-part-8-creating-a-form-action-workflow-the-after-math/comment-page-1/#comment-73090
Hope that helps… and thanks the encouragement.