
Kicking Off A Sharepoint Workflow from a Button, and [Much] More!
 Author: Marc D. Anderson
http://mdasblog.wordpress.com
A little while ago, I noticed that a fellow named Rob Doyle was asking some interesting questions about working with workflows in the SPServices Discussions. If you’re not familiar with SPServices, it’s my jQuery library which helps you to relatively easily work with the SharePoint Web Services. It also gives you what I call ‘value-added functions” which can really easily let you dress up your list and library forms to enhance the user experience and improve data quality. (There’s the sales pitch. Now go download that wonderful, free software!)
As we went back and forth on some issue he was having it became clear that he was building something pretty cool, using SPServices as one part of his toolkit. It sounded like it would be a good article to write up and share, so here it is. Rob was kind enough to do the majority of the writing, capture all of the screenshots, and clean everything up for general consumption. I just did a little editing, but the story is Rob’s. I hope you enjoy this inventive solution and great use of my SPServices library.
The Business Case
Recently, my team and I were asked to create an enterprise application to assist users in completing a convoluted and infrequently utilized – but absolutely required – business process: expense requests and purchase reports. The process itself can change as a result of the type of request being submitted, and many of the nuances are frequently overlooked. This leads to backtracking and lost productivity at both ends. Sound familiar?
Our goal was to create an electronic form which built in the dynamic business rules of the process, but which did not overwhelm the user. The solution ended up being a blend of InfoPath for the input form, SharePoint for the data storage and workflow processing, and jQuery (and specifically Marc Anderson’s SPServiceslibrary) for the UI layer.

Figure 1 – Entry Form for new requests
I designed the system to be a series of dashboards for the user, with only minimal interaction with their record requests. All actions that were allowable on a particular record would be shown in a table along with your standard identifiable details about the record itself.
An example:

Figure 2 – User Dashboard
Here, the individual records can either be simply Viewed or officially Logged to our final system of record. In other views, a record might be able to be deleted, copied, or have its status otherwise changed. All these actions were enabled or disabled according to the business process.
In general, when hitting one of the buttons the form itself appears in Edit or View mode, or a custom SharePoint Designer workflow is kicked off. The View page is a page with a single record data view and with a style sheet made to look similar to the InfoPath form using standard CSS techniques. Importantly, the site Master Page is not attached so that we can display the view page in a popup window.
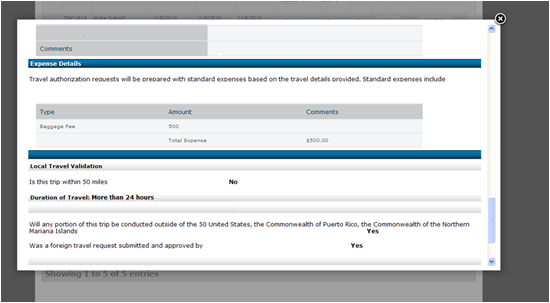
Figure 3 – ‘View’ record appears in an AJAX iFrame
Kicking off the workflows: Dataview Setup
The workflows themselves are kicked off using the SPServices “StartWorkflow” method. I’ve modified the function a bit to include an argument I named “wfID” to indicate which button was running which workflow. So if wfID = “delT” then the Delete workflow is run; if wfID=”confT” then the Confirm workflow is run. This allowed me to use this same function for all of the workflows in the entire application which updated a record.
On the page, all buttons using this workflow had their onclick event set as follows:
<a href="#" class="button">
<xsl:attribute name="onclick">
<xsl:text>javascript:StartWorkflow('https://yoururlhere.com</xsl:text>
<xsl:value-of select="@FileRef" disable-output-escaping="yes" />
<xsl:text>','</xsl:text>
<xsl:value-of select="@ID" disable-output-escaping="yes" />
<xsl:text>', 'confT');</xsl:text>
</xsl:attribute>
<xsl:attribute name="id">
<xsl:text>buttonID</xsl:text>
<xsl:value-of select="@ID" />
</xsl:attribute>
  <span>Confirm</span>
</a>
Looks like a lot, right? It is a lot of code to add in, but doing it in this manner allowed some huge flexibility with the solution: I was able to kick off any of the workflows on an item just by clicking that button and using literally the exact same JavaScript code. The workflow itself gets passed the ItemURL, its corresponding ID, and an argument which tells the JavaScript function which workflow to run.
The call to the function is in this form:
onclick=”javascript:Startworkflow(‘http://yoururl/itemsite/itemURL.xml’, ‘1048’, ‘workflow1’)”
Breaking it down:
The button itself is actually an anchor tag (<A>) with a class attached to it. This allows the same CSS code to be assigned to all the buttons, so I could copy and paste the entire block of button code, and change two items and be done.
<a href="#" class="button">
Then we use the power of XSL in the data view. Using the <xsl:attribute> tag allowed me to add additional attributes to the A tag and construct the code dynamically. The <xsl:text> tag allows us to add literal text to the line as well:
<xsl:attribute name="onclick"> <xsl:text>javascript:StartWorkflow('https://yoururlhere.com</xsl:text>
This results in the following line being added to the dataview:
onclick=”javascript:StartWorkflow(“https://yoururlhere.com
Then we add the file’s location, ID, and our workflow argument (along with the requisite commas and apostrophes), so that the workflow knows which item we are processing:
<xsl:value-of select="@FileRef" disable-output-escaping="yes" /> <xsl:text>','</xsl:text> <xsl:value-of select="@ID" disable-output-escaping="yes" /> <xsl:text>', 'confT');</xsl:text> </xsl:attribute>
Note the “confT” argument above – the function will be looking for this so that it knows which workflow to execute. …and that’s it for the JavaScript function call setup.
Then we close out the A tag with a span that includes the text to be shown on the button, and allows us to use this same exact line with every single button. The CSS formatting is beyond the scope of this article, but you can look up the term “sliding doors” and find any number of tutorials.
<span>Confirm</span> </a>
Now, when the dataview is displayed on the page, everything is updated with the correct ItemURL and ItemID as needed. So why do all this? Well, when a new button is required in another spot on the page, or on another page, only two items need to be updated: the workflow argument (“confT” above) and the text on the button itself. That’s it! The entire set of code as above can be pasted inside a <td> in the dataview and updated as needed.
Maintainability
Now that we’ve got the setup out of the way, let’s take a look at the JavaScript itself. In a less complex situation, we might hardcode the workflow values on every page, or have a distinct function that runs a specific workflow. There are two problems with this approach, however:
- Maintainability – it is monstrously difficult to update every single dataview in your site with the required values, and
- SharePoint is finicky when it comes to using workflows in this manner. The Web Service requires that a specific and current “TemplateID” be passed to the request – sort of the GUID for the workflow itself – and this TemplateID changes every time the workflow is updated.
There was no way I was going to update every dataview in our entire application (there are 12) every time the workflow changed. Our approach to minimize this was to use a lesser-known aspect of the Content Editor Web Part (and later this was incorporated directly into the master page).
We added the CEWP to the bottom of every page which included customized workflow calls and all our reference files, including the jQuery and SPServices libraries. Then the CEWP was pointed at a txt file which resided in a document library (and later in the _layouts folder). This meant that since all the distinct pages required the same supporting code, they could share this one file, and the file itself could be maintained in one location. Any time the workflow TemplateID changed – no problem – a single update and we were done! Hundreds of buttons were automatically updated the next time the page loaded.

Figure 4 – CEWP with codefile.txt reference
The JavaScript call itself
Here’s a sample of the JavaScript call which kicks off the majority of the workflows:
function StartWorkflow(ItemURL, ItemID, wfID)
{
if (wfID == "wrT")
{ tempID = "{7acb9ced-bd58-4ea4-993e-787a0773f1db}"; wfname = "withdraw?"; alert("you are running workflow" +tempID)}
else if (wfID == "wrE")
{ tempID = "{a6b9e3d5-fc89-428b-b861-0af09b56a4cc}";  wfname = "withdraw this expense report?";}
else if (wfID == "logT")
{ tempID = "{6d28a7fb-cffb-489b-966a-27efd6fc1082}";  wfname = "mark this request as logged?";}
else if (wfID == "logE")
{ tempID = "{cf69a2bc-e80b-4ee0-a3bd-b3577156996d}"; wfname = "mark this expense report as logged?";}
else if (wfID == "delT")
{ tempID = "{8a914bcb-b54b-4ef3-803a-47a7e1aef30f}";  wfname = "delete this request?";}
else if (wfID == "delE")
{ tempID = "{022276b6-3032-4354-b52f-6afdd2898e66}";  wfname = "delete this expense report?";}
else if (wfID == "confT")
{ tempID = "{02449161-b2f6-4f90-acad-174dd42c4617}";  wfname = "confirm this request as being withdrawn?";}
else if (wfID == "confE")
{ tempID = "{dfc7ed43-0c7e-4c50-a4d8-18df749743d5}";  wfname = "confirm this expense report as being withdrawn?";}
else {alert("Sorry, you've enountered an error! Please contact the helpdesk immediately");}
document.body.style.cursor = "wait";
var r=confirm("Are you sure you wish to " + wfname);

if (r==true)
  {
  $().SPServices({
    operation: "StartWorkflow",
    item: ItemURL,
    debug: true,
    templateId: tempID,
    workflowParameters: "<root />",
    completefunc: function(xData, Status)
    {
       var out =  $().SPServices.SPDebugXMLHttpResult({node:  xData.responseXML});

}
  });
  $("#rowID" + ItemID).find("td").fadeOut(1000, function(){ $(this).parent().remove();});
document.body.style.cursor = "default";
  }
else
  {
  alert("Cancelled!");
  document.body.style.cursor = "default";
  }
}
The code itself is very simple. The only modifications made have been to allow the additional “wfID” argument to be passed, and the corresponding templateID is inserted depending on the button pushed. That’s it! All the records are updated, emails are sent, and the record itself is removed from the screen without a time-consuming page refresh.
This line finds the table row which has been assigned in the code using the ItemID from the list, fades it out slowly, and then removes it completely from the table.
$("#rowID" + ItemID).find("td").fadeOut(1000, function(){
  $(this).parent().remove();
});
Because of the way the system is designed, that row will not appear again in this page, because its status has now changed as a result of the workflow successfully completing.
The Copy Function
One of the core requirements of the system was that users be able to copy previous requests in order to get a head start on filling everything out. This presented a number of challenges in our design, not the least of which is the common “I don’t know the ID of an item until after it’s been created” issue.
One of my design prerequisites was that the user never be interrupted from their personal process flow. This meant that on all dashboards, the system would present a ‘View’ or ‘Edit’ mode on a record on top of the dashboard itself. This allowed the user to finish reviewing or filling out their form, and go right back to the dashboard without interrupting their main flow, and without causing a single page refresh.
The copy function is kicked off using the exact same principles and xsl code in the dataview as all the other workflows, although the function name is different. Our call is instead:
onclick=”javascript:CopyWorkflow(‘ItemURL’, ‘ItemID’);”
The function itself does the following things:
- Alerts the user with a message box that this process takes a moment or two
- Places a jQuery overlay with a “processing…” icon over the screen so that the user can’t click on anything else during this process
- Runs a workflow which copies a blank version of the InfoPath form from a system library
- The workflow then updates that new destination form with all the values from the copied source
- Runs a modified version of Marc Anderson’s invaluable “GetLastItemID” function that pulls the last ID of the InfoPath file which matches the current user to a custom field called “DocOwner”
- Opens the new form in a new window on the same page
- Closes the overlay
Seems sort of a roundabout way of doing things, but is what you need to do in order to copy record values from an InfoPath form. Simply copying the document unfortunately doesn’t work. In the script, the code is pushed the same two arguments as the standard StartWorkflow function, and does not require the wfID argument, since we are always running the Copy workflow function.
<script type="text/javascript">
function CopyWorkflow(ItemURL, ItemID)
{
  var Itempath = "https://yoursystemURL.com" + ItemURL;
  alert("Please wait - this function may take a few moments");
  var overlay2 = jQuery('<div id="overlay2"><img src="loader.gif" /><p>Your new form will appear in a new window momentarily</p></div>');
  overlay2.appendTo(document.body);
  $().SPServices({
    operation: "StartWorkflow",
    item: Itempath,
    debug: true,
    templateId: "{4c9edb2c-b6f4-4c91-97c6-641b3219ec1e}",
    workflowParameters: "<root />",
    completefunc: function(xData, Status) {
      var lastdoc = $().SPServices.SPGetLastDocId({ listName: "PreTravel" });
      var out =  $().SPServices.SPDebugXMLHttpResult({node: xData.responseXML});
      alert("Copy Complete");
      alert("lastID is: " + lastdoc);
      var newurl = "Yoursite.com/sitepath/_layouts/FormServer.aspx?XmlLocation=/sitecoll/library/REQ" + lastdoc + ".xml&DefaultItemOpen=1&OpenIn=Browser";
      newwindow = window.open(newurl, 'Edit', 'width=900, height=600, status=no, directories=no, location=no, menubar=no, toolbar=no, scrollbars=1');
      if(window.focus) {newwindow.focus()}
      //$("#overlay2").remove();
      $("#fancy_overlay").fadeOut();
    }
  });
}
GetLastDocID
Here’s a final item, where I’ve modified the GetLastItemID function to pull a particular document ID. The only real modification is that we are matching on the “DocOwner” field, not the “Created” or “Modified By” field. If I could go back to this one, I would have modified it to accept the field name as a parameter.
$.fn.SPServices.SPGetLastDocId = function(options) {

    var opt = $.extend({}, {
      webURL: "",        // URL of the target Web.  If not specified, the current Web is used.
      listName: "",
      userAccount: "",
      CAMLQuery: ""
    }, options);

    var userId;
    var lastId = "none.xml";
    $().SPServices({
      operation: "GetUserInfo",
      async: false,
      userLoginName: (opt.userAccount != "") ? opt.userAccount : $().SPServices.SPGetCurrentUser(),
      completefunc: function (xData, Status) {
        $(xData.responseXML).find("User").each(function() {
          userId = $(this).attr("ID");
        });
      }
    });

    // Get the list items for the user, sorted by Created, descending. If the CAMLQuery option has been specified, And it with
    // the existing Where clause
    var camlQuery = "<Query><Where>";
    if(opt.CAMLQuery.length > 0) camlQuery += "<And>";
    camlQuery += "<Eq><FieldRef Name='DocOwner' LookupId='TRUE'/><Value Type='Integer'>" + userId + "</Value></Eq>";
    if(opt.CAMLQuery.length > 0) camlQuery += opt.CAMLQuery + "</And>";
    camlQuery += "</Where><OrderBy><FieldRef Name='Last_x0020_Modified' Ascending='FALSE'/></OrderBy></Query>";

    $().SPServices({
      operation: "GetListItems",
      async: false,
      webURL: opt.webURL,
      listName: opt.listName,
      CAMLQuery: camlQuery,
      CAMLViewFields: "<ViewFields><FieldRef Name='ID'/></ViewFields>",
      CAMLRowLimit: 1,
      CAMLQueryOptions: "<QueryOptions><ViewAttributes Scope='Recursive' /></QueryOptions>",
      completefunc: function(xData, Status) {
        $(xData.responseXML).find("[nodeName=z:row]").each(function() {
          lastId = $(this).attr("ows_ID");
        });
      }
    });
    return lastId;
  };

</script>
So that’s it – a focus on maintainability and running workflows using SPServices. But here’s the best thing: this entire application is not only easy to maintain, it is now entirely portable to be deployed to other sites in our environment. We are already working on a modified version to automate another process.
If you have questions post them here, or Rob Doyle can be reached through his LinkedIn profile.
Author: Marc D. Anderson
http://mdasblog.wordpress.com
Marc D. Anderson is a Co-Founder and the President of Sympraxis Consulting LLC, based in Newton, MA. He has over 25 years of experience as a technology consultant and line manager across a wide spectrum of industries and organizational sizes. Marc has done extensive consulting on knowledge management and collaboration and what makes them actually work in practice. Read More.


Marc,
Rob,
Very impressive Middle Tier solution!
There are a lot of nifty tricks and ideas in this post and this is a really awesome build up on Jason McKenzie’s post http://www.endusersharepoint.com/2010/04/21/4-clicks-or-1-using-jquery-to-start-a-sharepoint-workflow/ and Mark Rackley’s initial post http://www.endusersharepoint.com/2010/01/06/outing-sharepoint-workflows-%e2%80%93-linking-to-workflows-in-list-views-and-item-displays/ [Mark - if you read this, I am pointing to the cross-posted entry at EUSp b/c I just can't find your posts on the http://www.sharepointhillbilly.com/ - would there be a way to improve the search on it - you have some excellent content but it's somewhat hard to find]
The templateID parameter changing everytime a change is made to the WF is definitely a productivity and maintainability killer.
You decided to hardcode the TemplateIDs in the js file. What would have been the pros and cons of using the GetTemplatefromItem operation http://spservices.codeplex.com/wikipage?title=GetTemplatesForItem&referringTitle=Workflow ? Guessing that at some point in time, your workflows are only being updated once in a while and that another webservice call is probably overkill?
Greg
Hi Greg -
thanks for your comment! I definitely used Jason’s article as our initial starting point, and I’m sure I’ve seen Mark’s as well…
Great question about the GetTemplatesForItem operation – the honest answer is that I just didn’t stumble upon that function until we were already too far into development. I realized we could have used it right at the tail end, but it was just too big a change to incorporate. If you could see the pages we are loading, we actually do 3 separate calls with linked-source DVWPs, cross-referencing several other lists, and then pack them all up into tabs, run the brilliant DataTables jQuery plugin on them, and incorporate our workflow code plus the FancyBox jquery plugin. I started getting worried we were doing way too much on the client side, and this would have added an additional call and thus, an additional page load delay. As it is, they load remarkably fast, though we’ve had to do some tweaking to eke out a little bit better performance.
Any chances for a follow up articles with an emphasis on the ‘graphic’ side of things – thinking about css for rounded corners, your choice for the overlay solutions (http://www.fancybox.net/home ?) and Integration with InfoPath (I am new to it and got a little bit confused on what you use OOTB vs. custom forms)
I am guessing from the screenshots that you are using 2007 – would you have use a jQuery based overlay solution or try to leverage the ‘new’ overlay forms uyou get with SP2010?
Thanks a lot for sharing your solution!
Greg
PS: Would a video highlighting the UX be possible?
I’m sure I or one of the other folks could do a big post on that… My goal with this project was to make it as non-SharePointy as possible, so that we could later say “… all this, AND it’s built on SharePoint!” to a cadre of stunned faces, mouths hanging open. (Hey, I can dream, can’t I?)
I may add the InfoPath solution as a potential future post – that is an entirely different can of worms, and fraught with many many ‘gotchas’.
Suffice it to say that the InfoPath form was built with the standard browser-only controls, (not from an MS template) and uses several datasource connections to pull in data, especially on edit and copy functions.
Greg – I didn’t respond to a couple of your questions from before:
InfoPath was used in this solution because of the business logic required (if you answer question 1, you don’t need to answer questions 3, 4, 5), and the validation logic required. All of this could easily have been done with javascript, but we just didn’t have time. I have a great team of people (Omar, Richie, and Kala) who all specialized in certain areas for this solution (design, InfoPath, workflows) respectively.
So yes, this is built on 2007 – I really like the new 2010 customizable forms, but I am not sure the solution would have worked for us this time. There is a lot of logic in the form that I sort of glossed over. I’d be happy to do a follow-up if there’s more interest.
Heather Solomon’s site is absolutely crammed with great design considerations, in particular the rounded corners:
http://bit.ly/i1dhY
and the datatables plugin is brilliant
http://www.datatables.net
The building/coding is so beyond me that my primary emotion is jealousy that I can’t do this type of work… yet. But I applaud your awesome ingenuity. Brilliant result!
Nancy:
Remember that everything is beyond us until we learn how to do it!
M.