
Life is Just a Bowl of SharePoint – Part 3: SQL Server Database Engine and Management Tools Installation
 Guest Author: Joan Resnick Ehrlich
You cannot have SharePoint without SQL Server in one edition or another.
I decided to install SQL Server 2008 R2 Enterprise CTP in three steps: the Database Engine (DB Engine) and Shared Features first, followed by Reporting Services (RS) and finally Analysis Services (AS). The Shared Features include the Management Tools.
Analysis Services can be installed in “traditional” mode and beginning with SQL Server 2008 R2, in “AS with SharePoint integration” mode; the latter mode is PowerPivot. SQL Server Enterprise edition is required for PowerPivot. The PowerPivot team has a blog post: Comparing Analysis Services and PowerPivot. We need traditional AS and our Finance department will be interested in PowerPivot, so we will be installing both. We will install PowerPivot last, after installing and configuring SharePoint 2010 and Project Server 2010.
Reporting Services also has two modes: traditional RS and “RS in SharePoint-integrated mode”. We will be using RS with SharePoint exclusively, so the latter mode is all we will configure.
DB Engine Installation
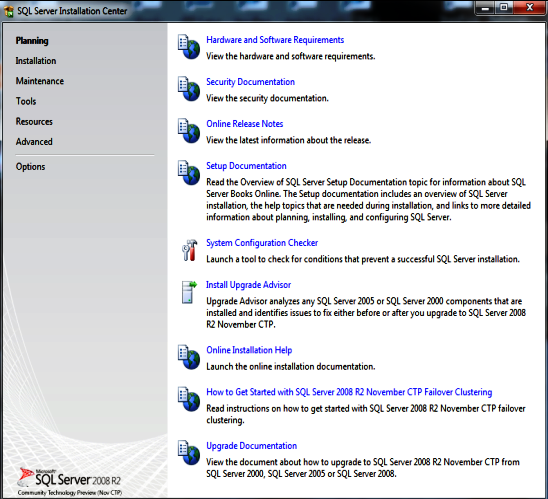
The DB Engine/Shared Features installation was easy. Starting setup launched the SQL Server Installation Center, which is sectionalized based on function and provides information, documentation, and guidance in one place: [All screenshots are from my home network installation.]
Speaking generally, setup routines have come a long way from Windows 3.1. The routines tell you what they are doing and indicate when a step will take a long time, so you don’t think the installation has frozen and you forcibly stop it which [used to] lead to all sorts of trouble. The routines have Back buttons to allow you to correct mistakes, Retry buttons if you mistype and cause an error, and “Fix the issue and try again” if you encounter an error midstream. They also roll back changes if you cancel during the installation process. Who would have ever imagined? (Alas, some companies still do not provide decent setup routines.)
When SQL setup runs it first checks to see if the prerequisites are installed. See Hardware and Software Requirements in the SQL 2008 R2 BOL (Books Online), the primary documentation for SQL. (BOL installs with SQL, can be accessed online at TechNet or MSDN, and can also be downloaded from the Microsoft Download Center.) Once the prerequisites are installed the SQL Server installation routine starts.
- The Installation section presents five options. I needed the first option: New installation or add features to an existing installation:
- Setup checks for requisites before installing the Setup Support files. If a problem is found setup provides information about it. No issues were found.
- Product key time or select free 180-day evaluation:
- License terms are presented next. (No screenshot but of course if you want to continue you have to agree.)
- Ready to install Setup Support Files:
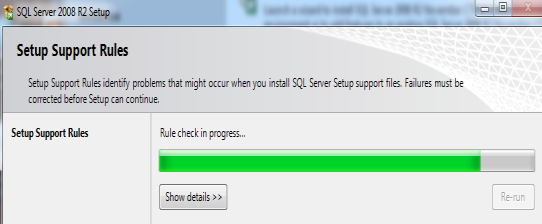
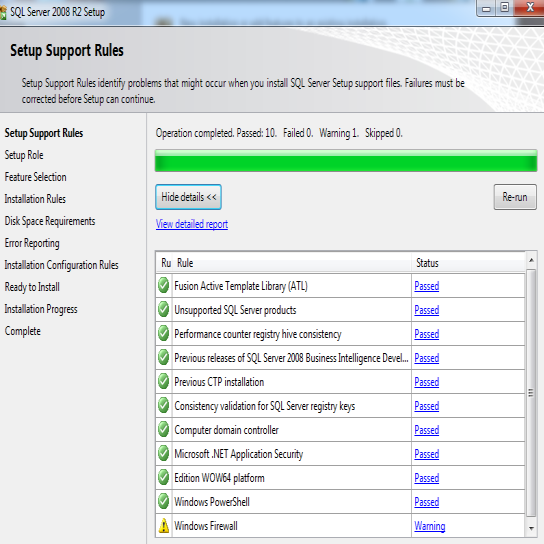
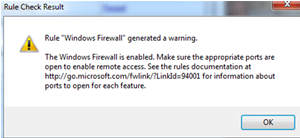
- Once the Setup Support Files are installed the real action begins. Setup runs another check. Note the Windows Firewall warning; this happens every time setup is run. It is simply a warning to make sure the ports necessary for network communication are open. I did so after installation.
- Role Selection is next, with three options for which features to install and how. The second option “Analysis Services with SharePoint Integration” is PowerPivot (Gemini was the code name). The first and third options provide all other features except PowerPivot. The first option allows you to selectively control which features to install, whereas the third option installs all of the same items at once using default values. As I wanted to control which features to install I chose the first option:
- Feature Selection follows. I chose all features, except of course AS and RS so that I could install each separately afterwards. Note: If you want to install the AdventureWorks2008R2 sample databases (SQL Server 2008 R2 November CTP AdventureWorks Sample Databases), Full-text Search must be installed.
- Setup checks for any potential problems that might interfere with installation:
- Next up is Instance Configuration. Here is the spot to select the Default instance or create a Named instance. SharePoint can use either; in fact a Named instance is necessary if the Default instance is being used by another web application. I chose the Default instance. The port defaults to 1433 and the name to MSSQLSERVER. Here is also where to specify the location for the Instance root directory.
- Setup checks for available disk space:
- The Server Configuration stage is next and presents two tabs: “Service Accounts” and “Collation”. On the Service Accounts tab I selected the service account I created for the DB Engine. I am using the same account for the SQL Server Agent as well. (See About SQL Server Agent in the BOL for an explanation of what the Agent does.)
- The Database Engine Configuration section, next, has three tabs: Account Provisioning, Data Directories, and FILESTREAM. On the Account Provisioning tab, I selected the Authentication Mode and specified the SQL DB Admins:
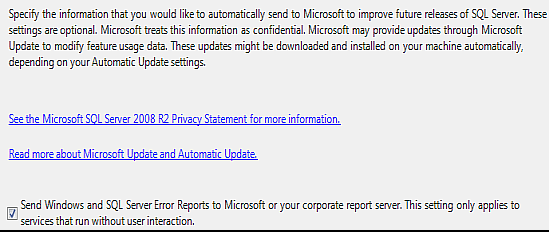
- Error Reporting is the next step:
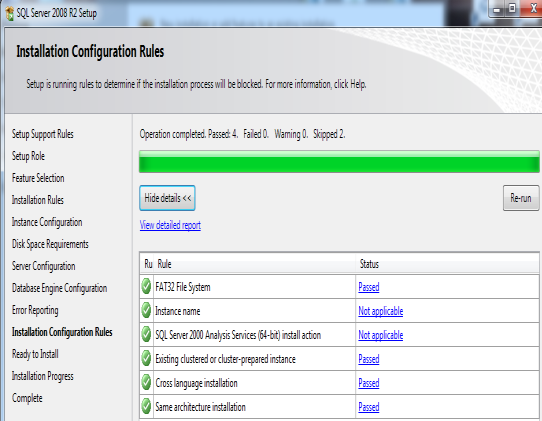
- Another Rules check:
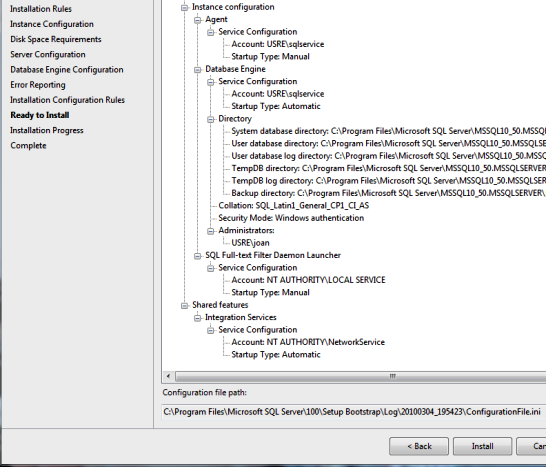
- Finally, we are ready to review the choices and install. This is the time and place to inspect the chosen settings carefully and use the Back button to correct any mistakes.
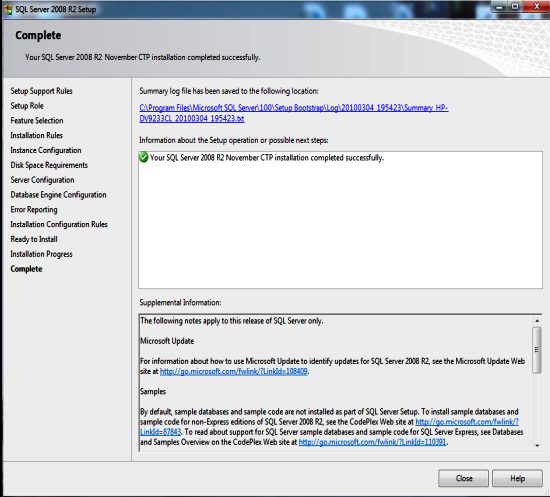
- Installation completed successfully:

Note the use of the term “instance” in the option description. For those of you unfamiliar with SQL Server, an instance is a copy of SQL Server running on a computer. More than one copy can be installed onto the same computer. The multiple instances run concurrently but are separate. For example, each instance of the DB Engine has its own system databases. You can have multiple instances of AS and/or RS in addition to multiple instances of the DB Engine. The number of allowed instances is based on SQL edition licensing. Each instance except for a “Default instance” requires a unique name and is referred to as a “Named instance”. Typically the Default instance is used for the first instance each of the DB Engine, AS, and RS, but you can use a Named instance instead. The choice is offered during installation as long as the Default instance has not already been used. The SQL Server Reference Guide at InformIT.com is one resource that provides a detailed explanation.
The “Please wait” message, which appears several times during installation, popped up:


The Warning link provided this message:

Note that PowerPivot is only available via the second option, as PowerPivot requires its own named instance (the name is hardcoded). There can be only one PowerPivot instance per server, though you can install other (traditional mode) AS instances on the server, and you can install PowerPivot on multiple servers to scale it out. (Yes, confusing. I finally got the hang of it after a while.) Too, PowerPivot installs onto a SharePoint application server. In a one-server scenario this is the same machine as SQL, though the one-server scenario is typically for testing and development.

Note that Books Online is always installed; the selection is checked and cannot be unchecked.

All of the rules marked “Not Applicable” appear to apply to PowerPivot or RS in SharePoint Integrated mode, except for the 64-bit processor and operating system rules. I can only imagine the latter two are marked “Not applicable” because SQL Server 2008 R2 is 64-bit only and setup would have balked from the start on a 32-bit machine with a 32-bit OS.


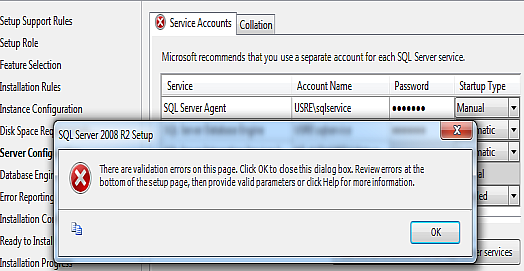
Quirk report: When I clicked Next (totally forgetting about the Collation tab, by the way), setup threw an error:
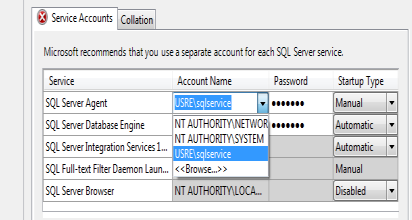
Thinking I had typed the password wrong, I retyped it. Same error. I cleared account and password from all cells and then manually typed them in. Same error. And again. (You would think that I would think I got it right by then, and I did think that. How slowly can you type a password and get it wrong?) So I changed the password in Active Directory, waited for replication to the other DC, and tried again. Same error. So I thought and thought. (In my defense, it was after midnight.) If the password was not the issue, the account must be. Process of elimination time. I had browsed for the account in the Agent cell. I had selected it from the drop down in the DB Engine cell. I had manually typed it in both cells. The only thing I did not try was to select the account from the drop down in the Agent cell. And voila! No error.
Well, after that exhausting brain exercise, I forgot about the Collation tab. I wanted the default anyway, and as for the screenshot, there’s more than one way to get the job done:
Note: Microsoft recently issued a “Fast Publish” KB article Supportability regarding SQL collation for SharePoint Databases and TempDB that stresses the default collation is required for SharePoint databases and tempdb, which is one of SQL Server’s system databases. (For an overview of the system databases see this two-page article at SQL-Server-Performance.com. See Understanding Databases in the SQL Server 2008 R2 BOL for in-depth material.) SharePoint 2010 is not listed in the applicable products section of the KB (WSS and MOSS are) and I cannot find mention of same for SharePoint 2010 on TechNet (did I miss it?), but I have no reason to change the default.

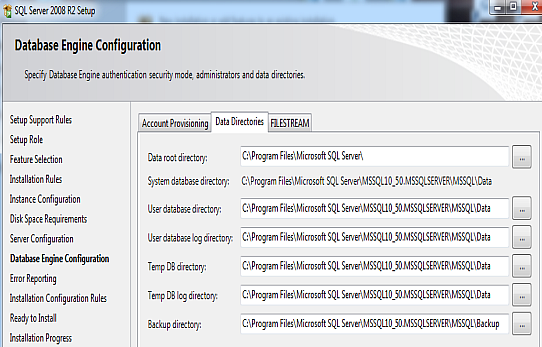
The Data Directories tab provides granular control for file locations. The MS SQL Server team recommends the database files (.mdf), database log files (.ldf), and tempdb be placed on separate disks (not just separate partitions) and none be placed on the OS disk. For the test network we mimicked with partitions. (This screenshot shows my home network; everything got plopped on C:\)
The FILESTREAM tab: Perhaps I’ll experiment with this, so I enabled the solution and provided a share name for SharePoint 2010 to use:

Here’s a “somewhat” explanation of FILESTREAM: FILESTREAM is a solution to help manage unstructured data. SharePoint content is either structured or unstructured. Unstructured data includes, for example, documents, images, and videos. Up until SQL Server 2008, when FILESTREAM was introduced, all data lived in SharePoint databases. Unstructured data is stored in a database as a BLOB (Binary Large Object). (The term never fails to conjure up the movie. The Steve McQueen version.) FILESTREAM provides the ability to store unstructured data in the NT file system instead of the database. SharePoint takes care of keeping track of the data, and with 2010 SharePoint fully supports remote BLOB storage (RBS). If I recall correctly, one of the SharePoint 2010 conference sessions cited 5 terabytes (5TB) as the price/performance point at which RBS could be considered.

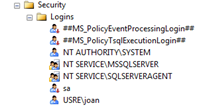
A post-installation check showed the SQL services were present and the SQL service was running. I started SQL Server Agent and changed its startup type to Automatic. I connected to the DB Engine using SQL Server Management Studio and the System Databases (except for the read-only, hidden Resource Database), Security Logins and Server Roles were present:
|
|
|
|


There were quite a number of errors in a row in the Application Event Log regarding Visual Studio Templates, such as:

The last error summarized the issue:
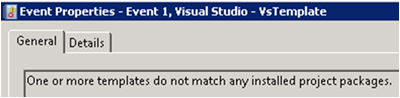
A search revealed the referenced Visual Studio applications (C# in the above case) were not installed. SQL Server does not install these VS applications so I ignored the errors.
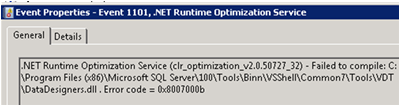
There were also two Event ID 1101 .NET Runtime Optimization errors: “Failed to compile” DataDesigners.dll and DataProjects.dll, respectively. I found out these files are part of the Microsoft Visual Database Tools (VTD) Package 8.00 and the error means that native images for the files were not generated and installed. A search turned up a few others had the errors on installation but I did not see a solution. One forum poster tried using the ngen utility (MSDN link) to generate and install the native images but that did not work. (I did not try – I did learn a tiny bit about ngen and how to display a list of native images but I need to understand more first.) Hopefully there will be more information if we run into these errors at RTM. I don’t believe these will impact the Beta testing.

I still needed to open the necessary ports in the Windows Firewall and enable the necessary protocols in SQL Server Configuration Manager. I will walk through these steps in my next article.
Guest Author: Joan Resnick Ehrlich
Joan Resnick Ehrlich has been in the IT industry for 15 years and is Corporate IT Administrator for a mid-sized company on Long Island, NY. Prior to entering the industry Joan was a business researcher, and she enjoys combining her research skills with IT work. In addition to SharePoint, her primary responsibilities include Windows Server, Active Directory, Exchange Server, and SQL Server.
- Life is Just a Bowl of SharePoint – Part 1: Introduction
- Life is Just a Bowl of SharePoint – Part 2: Setting up the Hardware, OS and Service Accounts
- Life is Just a Bowl of SharePoint – Part 3: SQL Server Database Engine and Management Tools Installation
- Life is Just a Bowl of SharePoint – Part 4: Configuring Ports and Protocols
- Life is Just a Bowl of SharePoint – Part 5: Installing SQL Server Reporting Services and Configuring for SharePoint Integrated Mode
- Life is Just a Bowl of SharePoint – Part 6: Installing SQL Server Analysis Services
- Life is Just a Bowl of SharePoint – Part 7: Installing SharePoint 2010 Beta Take 1
- Life is Just a Bowl of SharePoint – Part 8: Installing SharePoint 2010 Beta with Kerberos
- Life is Just a Bowl of SharePoint – Part 9: Post Installation Event Log Warnings and Errors
- Life is Just a Bowl of SharePoint – Part 10: Configuring Search (Kerberos cont’d)
- Life is Just a Bowl of SharePoint – Part 11: Creating Web Applications and Site Collections

Nice article Joan. Very compact and at the same time detailed enough.
I happened to run across this same error you mention at the end and am curious if you have ever revisited this item? I still don’t really find any meaningful commentary besides yours and this KB article: http://support.microsoft.com/kb/2002607
I am with Jacob: your writing is refreshing and helpful. Many Thanks,
Deanna,
No, but it had no effect on SharePoint.