How to get an SPD Workflow to Run at a Specific Time – Employee Vacation Reminder: Part 2
 Dessie Lunsford
Points-of-Sharing
SharePoint Designer – Act II
So, to build out the actual workflow itself, back to SharePoint Designer we go.
After clicking “Next” on the initial workflow creation page, you’ll be taken to the details page for the first step:
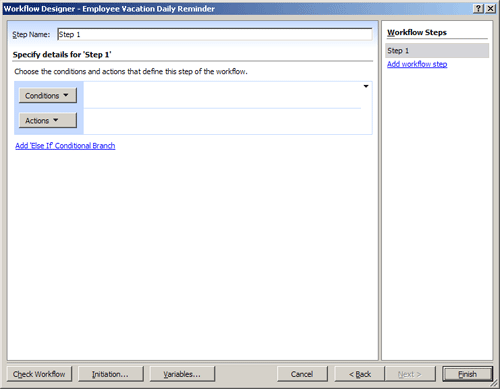
Case 1
The first thing we need to do is setup our first “Case” that the workflow will be looking for.
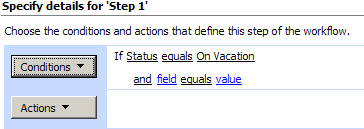
Click on “Conditions” and choose “Compare Employee Vacations field”. You’ll now see “If field equals value” in the first section.

Click on the “field” link and choose “Status” from the dropdown.
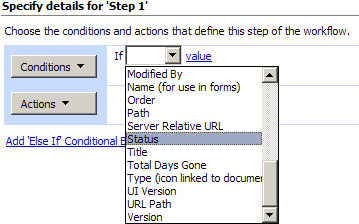
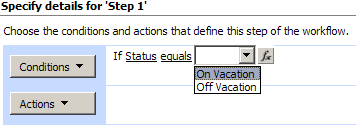
Click on the “value” link and choose “On Vacation” from the dropdown.
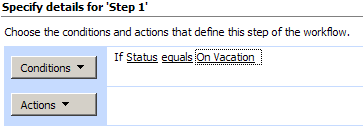
This should now appear as:
Click on “Conditions” again and choose “Compare Employee Vacations field” a second time to add in a second condition (you’ll see it add in an “and” before it).
Click on the “field” link and choose “Count” from the dropdown, then click on the “value” link and type in a “0” (zero).
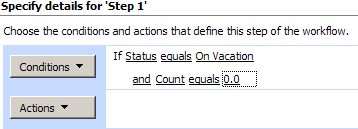
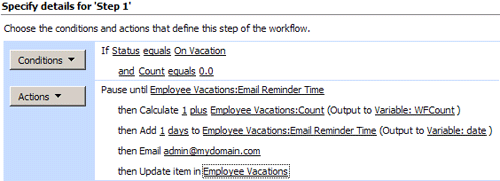
This first “case” or set of “conditions” to look for will simply look at the “Status” of the employee and if they are currently “On Vacation” and if the “Count” field is currently set to “0” (the default value when the item was created on the list), then it will process whatever “Actions” are listed directly below it (which we’ll define next). If at least one of the two conditions is not true (based on “Truth Table” logic – see here for reference), then as a “Jedi” would say…”This is not the case you’re looking for” and will look at the next case to see if it’s “True”.
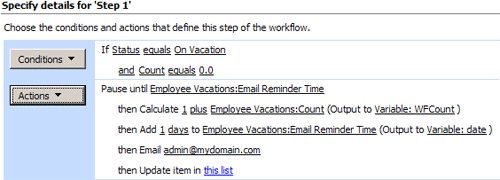
Moving on, click on “Actions” and choose “Pause until date” (NOTE – for this and any following steps where you select and action, if the mentioned action does not appear in the list, click on the “More Actions” option at the bottom of the list to see a complete list of all actions to select the action mentioned).
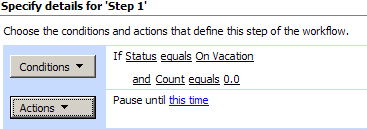
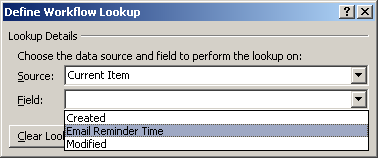
Click on the “this time” link then click the little “fx” button on the right then choose “Email Reminder Time” in the lookup window that opens then click “OK” to close the window and return to the workflow details screen.

Click on “Actions” again and select “Do Calculation”.

Click on the first “value” link and type in a “1” (one).

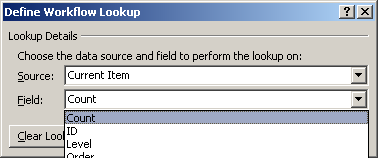
Click on the second “value” link then the “fx” button and in the window that opens, choose “Count” in the “Field” dropdown then click “OK” to return to the workflow details screen.

Click on the “Variable: calc” dropdown link and choose “Create a new Variable”.

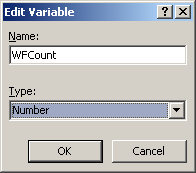
In the small window that opens, enter “WFCount” in the “Name” field and choose “Number” for the “Type” then click “OK” to return to the workflow details screen.

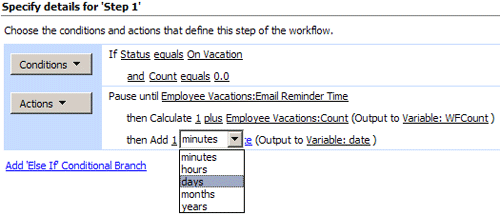
Click on “Actions” again and choose “Add time to date”.

Click on the “0” link and type in “1” (one).

Click on the “minutes” link and choose “days” from the dropdown.
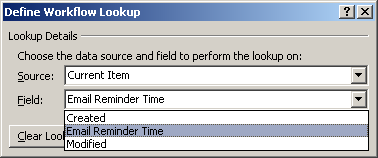
Click on the “date” link and then the “fx” button, and then choose “Email Reminder Time” in the “Field” dropdown of the window that opens, then click “OK” to return to the workflow details screen.

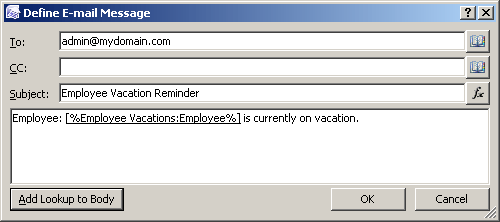
Click on “Actions” again and choose “Send an Email”.

Click on the “this message” link and fill out the details required in the email definition page, then click “OK” to return to the workflow details screen.

Click on “Actions” one final time and choose “Update list item”.
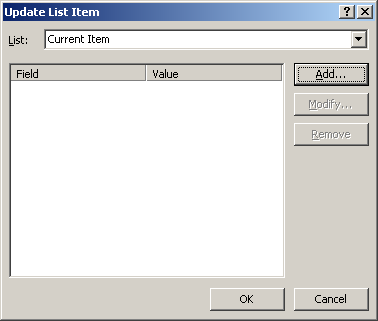
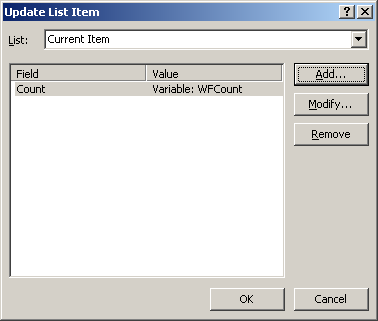
Click on the “this list” link.
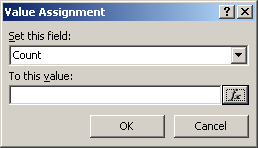
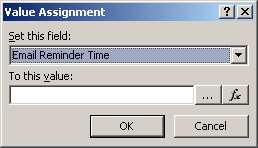
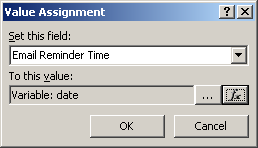
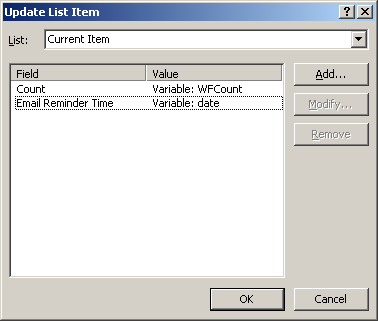
Click on “Add”, then in the “Value Assignment” window that opens, choose “Count” in the “Set the field” dropdown, then click the “fx” button.
In the “Lookup” window that opens, select “Workflow Data” in the “Source” dropdown, and select “Variable: WFCount” in the “Field” dropdown.
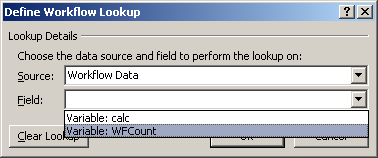
Click “OK” twice to return to the “Update List Item” screen, then click on “Add” again, then in the “Value Assignment” window that opens, choose “Email Reminder Time” in the “Set the field” dropdown, then click the “fx” button.
In the “Lookup” window that opens, select “Workflow Data” in the “Source” dropdown, and select “Variable: date” in the “Field” dropdown.
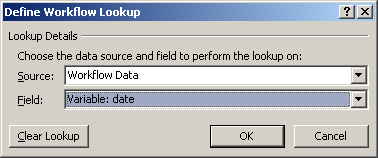
Click “OK” three times to return to the workflow details screen.
Whew!! Still with me?? Ok, now that we have the first case built, we can move on to the second case.
 Dessie Lunsford
Points-of-Sharing
- How to get an SPD Workflow to Run at a Specific Time - Employee Vacation Reminder: Part 1
- How to get an SPD Workflow to Run at a Specific Time - Employee Vacation Reminder: Part 2
- How to get an SPD Workflow to Run at a Specific Time – Employee Vacation Reminder: Part 3
- How to get an SPD Workflow to Run at a Specific Time – Employee Vacation Reminder: Part 4
- How to get an SPD Workflow to Run at a Specific Time – Employee Vacation Reminder: Part 5


Hi Dessie
I am still with you – my wofkflow is done. Just waiting on the second case.
See you tomorrow
Perfect! I’m just getting started with SharePoint and this was exactly what I was looking for. Can’t wait for the next installment!
This article was great Dessie, appreciate you writing it. Im with Laura on this, starting to find out the innner workings of SharePoint and this greatly help me out. Looking forward to what you got next.
Thanks for the comments!!
This series is in a 5-part installment (part 3 just posted), so stay tuned all the way through friday for it’s completion.
- Dessie