
SharePoint: Extending the DVWP – Part 17: User-Managed Dropdowns – Creating a Relationship list
 Author: Jim Bob Howard
Whether working with cities and states, sizes and colors, jobs and locations, etc., the ability to cascade—or limit—the choices of one dropdown based on the selection in another is a requirement for usability.
But before we start cascading our dropdown selections, we need to consider the data that will be in each one and the relationship between them. In many cases (sizes/colors; jobs/locations), it’s also imperative that a content owner be able to modify the selections in a list. The standard choice column type isn’t the best option for this because the data is "hidden" within the column definition.
Using a lookup column makes much more sense. And that’s what we need if we’re going to cascade our dropdowns.
Note: All of the content and thought process for this article arose from a discussion with Marc Anderson in January 2010 on the discussion forums for his jQuery Library for SharePoint Web Services (SPServices). You can read the entire conversation here.
Site Columns for Cascading dropdowns
What if the dropdown option choices are managed by one group, but used by another? For example, HR may need a strict definition of job titles, but a manager may be the one who is controlling the list of employees that use that title. So, how do we "reuse" data that might be useful company-wide?
Answer: Use site columns, which I discussed in the last article in this series.
Assuming you followed the advice in the last section, of the Countries and States, you already have the two data lists. You will need the related data to be stored in the respective lists before setting up the relationships.
It’s All in the Relationships
Cascading dropdowns depend on the relationship between the data in the two dropdown lists. So, first we create a list for each of the sets of data (e.g. Countries and States); then we set up a list that describes the relationship between the two.
Let’s now set up the relationship list.
- Click Site Actions -> Create
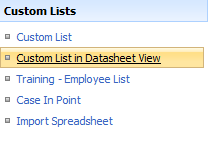
- Under Custom Lists, click Custom List in Datasheet View
- For this example, I’m going to relate Countries and States, so I’ll name it RELCountryStates
- You’ll now see that we have a list in Datasheet view. Let’s modify it, then we’ll load the data. Click Settings -> List Settings
- Change the name
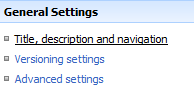
- Under General Settings, click Title, description and navigation
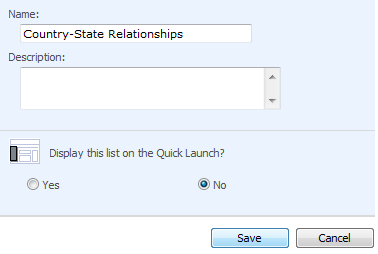
- Change the Name to something descriptive (e.g. Country-State Relationships)
- Click the Save button
- Remove attachments
- Under General Settings, click Advanced settings
- Under Attachments, click Disabled
- Click the OK button (twice)
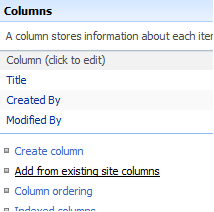
- Add site columns
- Click Add from existing site columns
- Click both site columns and click the Add > button
- Leave Add to default view checked and click OK
- Click the list name in the breadcrumbs to return to the datasheet view
- You will need the related data to be stored in the respective lists before setting up the relationships. If you haven’t done that already, do it now. (Last time, I shared a method for quickly loading data in the lists used by your site columns.)
- Now, all you need to do is add a record for every State in your site column list and relate it to its Country.
- Loading these one by one will take forever, so we’re going to do something similar to what we did when we loaded the site column lists, by pasting the entire list into this table. But we’re going to have a bit of an issue with the Title column, which is required by default. Here are our options:
- We can make the Title optional (and hide it from view, if desired)
- We can make it optional and create a workflow that concatenates the site columns to make up a unique Title. (Not recommended.)
- We can use Excel to create our entire Country-State Relationships table and paste the entire thing in here.
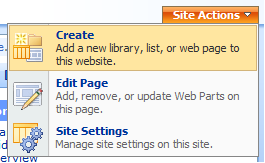
From main site, click Site Actions -> Create
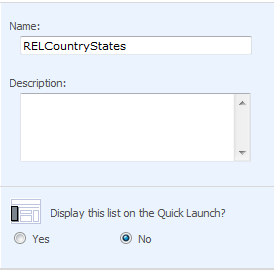
Creating the relationship list with a name that contains no spaces will help us down the road
Notice that I don’t want this to show up in the Quick Launch (your requirements may vary).
Give your list a name without spaces for now; this will set its ’static name.’ We’ll update the ‘display name’ in the next step.
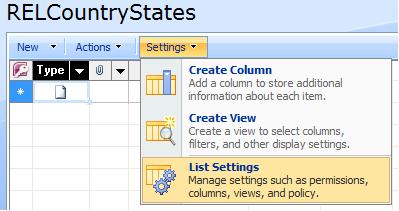
RELCountryStates – Click Settings -> List Settings
Set the ‘display name’ of the List
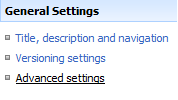
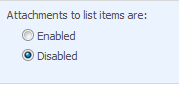
Disable attachments
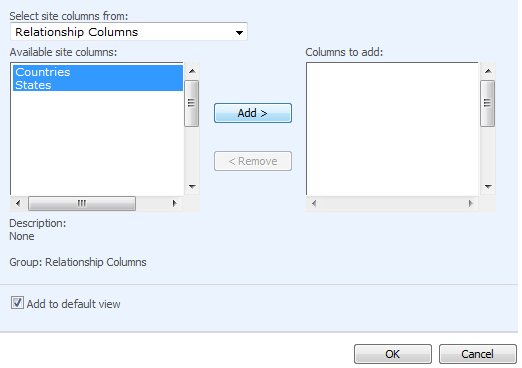
If you assign your relationship site columns to a common group, they’re easy to find
The breadcrumb will take you back to the datasheet view
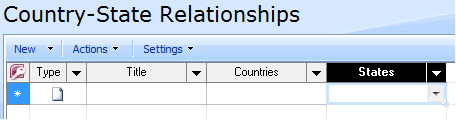
Datasheet view with site columns Countries and States
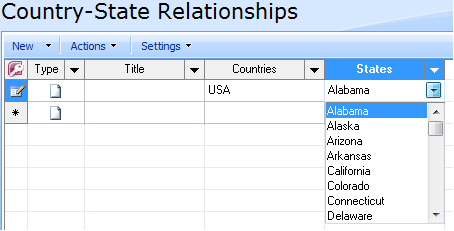
The site columns now have dropdowns for selecting only from valid values.
Next time, I’ll show you a quick way to load the data using the first option; then I’ll walk through it using Excel.
Author: Jim Bob Howard
Jim Bob Howard is a web designer / webmaster in the healthcare industry. He has been working with SharePoint since March 2009 and enjoys sharing what he has learned. He is a moderator and frequent contributor to Stump the Panel, and answers SharePoint questions on Twitter (@jbhoward) and via email ([email protected]).
- SharePoint: Extending the DVWP - Part 1: Layout Enhancement - Rearranging Columns - Default and Edit Templates
- SharePoint: Extending the DVWP - Part 2: Layout Enhancement - Rearranging Columns - Insert Template
- SharePoint: Extending the DVWP – Part 3: Getting it All on One Line - DVWP Function Action Links
- SharePoint: Extending the DVWP – Part 4: Turning DVWP Action Links into Buttons
- SharePoint: Extending the DVWP – Part 5: Doing Stuff Before Save on Submit - PreSaveAction()
- SharePoint: Extending the DVWP – Part 6: Examining the Form Action Links
- SharePoint: Extending the DVWP – Part 7: Creating a Form Action Workflow
- SharePoint: Extending the DVWP – Part 8: Creating a Form Action Workflow - The After Math
- SharePoint: Extending the DVWP – Part 9: Oops! Failed Setting Processor Stylesheet
- SharePoint: Extending the DVWP – Part 10: Passing Workflow Variables to a Form Action Workflow
- SharePoint: Extending the DVWP – Part 11: Getting More Form Fields to the Workflow
- SharePoint: Extending the DVWP – Part 12: Adding More Form Fields from the Data
- SharePoint: Extending the DVWP – Part 13: Putting PreSaveAction() to Work – Creating Variables
- SharePoint: Extending the DVWP – Part 14: Putting PreSaveAction() to Work with jQuery
- SharePoint: Extending the DVWP – Part 15: User-Managed Dropdowns with Site Columns
- SharePoint: Extending the DVWP – Part 16: User-Managed Dropdowns - Loading Data
- SharePoint: Extending the DVWP – Part 17: User-Managed Dropdowns – Creating a Relationship list
- SharePoint: Extending the DVWP – Part 18: User-Managed Dropdowns – Loading the Relationship list – Part 1
- SharePoint: Extending the DVWP – Part 19: User-Managed Dropdowns – Loading the Relationship list – Part 2
- SharePoint: Extending the DVWP – Part 20: Cascading Dropdowns - Applying the jQuery
- SharePoint: Extending the DVWP – Part 21: Cascading Dropdowns - Three-tier Cascade
- SharePoint: Extending the DVWP – Part 22: Creating Title Based on Other Fields with jQuery
- SharePoint: Extending the DVWP – Part 23: Creating Title Based on Other Fields with a Workflow
- SharePoint: Extending the DVWP – Part 24: A Note to Readers
- SharePoint: Extending the DVWP – Part 25: Using an Audit Trail by Creating List Items with SPServices
- SharePoint: Extending the DVWP – Part 26: Modifying the Edit Template
- SharePoint: Extending the DVWP – Part 27: Adding an Alternate Edit Template to a DVWP
- SharePoint: Extending the DVWP – Part 28: Massage the Remove Template
- SharePoint: Extending the DVWP – Part 29: Modifying Form Action Workflows on the remove Template
- SharePoint: Extending the DVWP – Part 30: Using EasyTabs with Filtered DVWPs to Make Data Manageable
- SharePoint: Extending the DVWP – Part 31: Filling in Default Data on the insert Template with jQuery
- SharePoint: Extending the DVWP – Part 32: Filling in Default Data on the insert Template with Multiple DVWPs
- SharePoint: Extending the DVWP – Part 33: Modifying Total and Subtotal Row Layouts in DVWP
- SharePoint: Extending the DVWP – Part 34: Using Icons for Form Action Links
- SharePoint: Extending the DVWP – Part 35: Putting it All Together
- SharePoint: Extending the DVWP – Bonus: Fixing the Insert Form Action When "No Matching Items"
- SharePoint: Extending the DVWP – Bonus: Creating a Title Based on Dropdowns with jQuery


Hi Jim,
I actualy tested the SPServices cacading dropdows from Marc on SP2010 just yesterday!
Creating a 3rd ‘Relationship’ List is a great trick – however, I don’t see yet what the exact advantage of it is yet?
The way I had done it was lookup from 1 List towards the other at the item level and then fill out the look up column in the child list with the correct lookup using the Data view.
Can’t wait to see how you tie it with the DVWP.
Have you tried SP2010 yet?
Greg