
Navigating SharePoint 2010 – Part 2: The Quick Launch
 Guest Author: Adam Macaulay
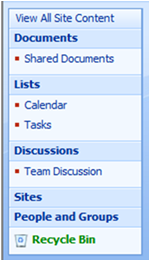
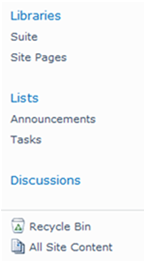
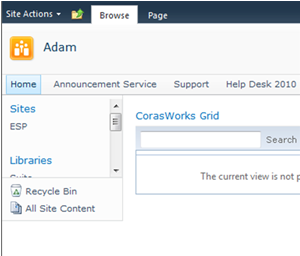
The Quick Launch is a site by site navigation panel which you can use to access any link that has been specified. By default you will see options such as Libraries, and Lists. Technically the Recycle Bin and (View) All Site Content are not a part of the Quick Launch and are instead their own links that live beneath the Quick Launch.
The Quick Launch hasn’t changed much since 2003 except in how you can manage it. In 2003, we could only manage it through Frontpage to add Headings and navigation was managed through FrontPage navigation. In 2007 you were allowed to manage the Quick Launch through Site Settings which enabled us greater flexibility without using SharePoint Designer. We also saw the introduction of new headings such as Sites and People and Groups. This continues into SharePoint 2010 with some of the terms and link locations being altered once again, for instance we no longer see Sites by default and the People and Groups heading has been removed. Another difference in 2010 is the Quick Launch will be visible on all pages inside of the site, even if inside of Site Settings. This was not the case on 2007.
2007 Quick Launch 2010 Quick Launch
Now that we know what the Quick Launch is, let’s focus on managing it. To manage the Quick Launch we will focus on 5 key areas.
- Display/Hide
- Create List and Site Settings
- Create Site
- Create List
- List Settings
- Look and Feel – Quick Launch Settings
- Headings
- Navigation Links
- Order
- SharePoint Designer
- Display Quick Launch in a Site
- Display List in Quick Launch
- Modify the Quick Launch Design – the v4.Master
- ScrollBars
- Height
Display/Hide
The simple question is do you want or not want to display a Quick Launch. I will show you how via the browser you can control this. You can also use SharePoint Designer to this and the instructions are below in the SharePoint Designer section. You will need Web Designer right to modify this.
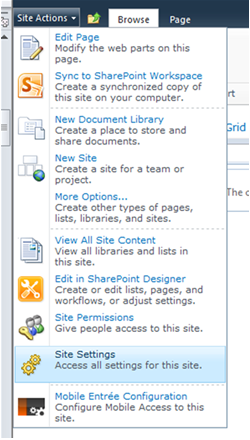
To display or hide your Quick Launch, go to your Site settings. This can be found within the Site Actions dropdown.
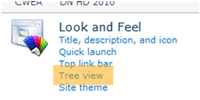
Under Look and Feel, click “Tree View”.
To display the Quick Launch check “Enable Quick Launch” and to disable it uncheck “Enable Quick Launch”.
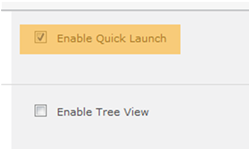
Once complete, click the OK button to save your changes. You should now see or not see the Quick Launch bar on page based upon your choice.
Create List and Site Settings
When we create a list or site we are given the option of controlling if the site or list should be made visible. Unlike in the list, if we choose not to display the site in the Quick Launch there is no way to have it automatically added to the Quick Launch and we will have to do so manually.
If you have used SharePoint 2010 and tried to create a site or list you likely have done so through the Silverlight picker and have not seen the option I speak of. That is because the option is not presented unless you choose the “More Options” button when creating the list or site. If you are not using the Silverlight picker then this option will be displayed to you during site or list creation. Note, when creating a list, it will automatically be added to the Quick Launch however when creating a site it will NOT be added automatically to the Quick Launch.
Let look at the two options.
Create List
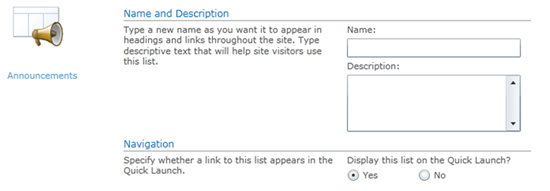
When creating a list and we have clicked on the More Options button, under the navigation group we are presented with the ability to display or not display the list in the Quick Launch. As you can see the default is Yes. Choose Yes to show the list in the Quick Launch and choose No to not. These options look identical in the ASPX version of the “New List” option.
Create Site
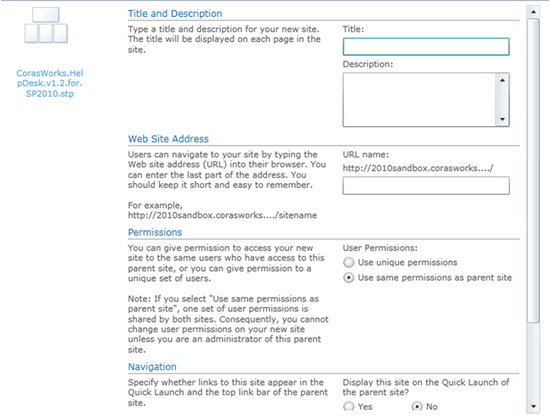
When creating a site and we have clicked on the More Options button, under the navigation group we are presented with the ability to display or not display the site in the Quick Launch. As you can see the default is No. Choose Yes to show the site in the Quick Launch or choose No to not. Remember if you choose No, you will have to manually add this later if you want it in the Quick Launch. These options look identical in the ASPX version of the “New SharePoint Site” option.
List Settings
After you create a list you can choose to hide or show the List Name in the Quick Launch. You can do this by modifying the List Settings in the browser or in SharePoint Designer. You will find instructions for using SharePoint Designer in the SharePoint Designer section below. We will focus on using the browser. For this you will need either Site Web Designer rights or Designer rights to the list.
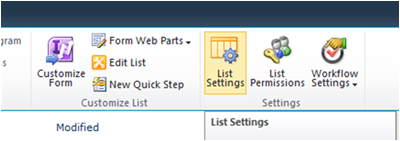
Enter the list that you want to show or hide in the Quick Launch. Click on the “List” tab in the ribbon and click on “List Settings”.
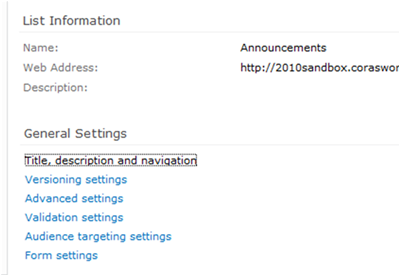
Inside of List Settings, under General Settings click on “Title, description, and navigation”.
Under the Navigation group, to enable the Quick Launch, choose Yes otherwise choose No.
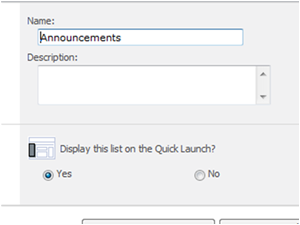
Click save to save your changes and you should or should not see the list in the Quick Launch depending on your setting. That’s the nice thing about the fact the Quick Launch is on every page now, you can see your changes immediately reflected.
Look and Feel – Quick Launch Settings
We can also modify the Quick Launch to include our own links to specific page or other sites. Remember if we didn’t select the Sub Site to be displayed in the Quick Launch bar when we created the site, we have to manually add it and that is what we will do here. We will also discuss how we can manage Headings. To manage the Quick Launch you must have web designer rights to the site.
To manage your Quick Launch go to your Site settings. This can be found within the Site Actions dropdown.

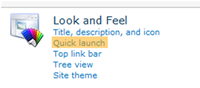
Click on “Quick Launch” under the Look and Feel Group.
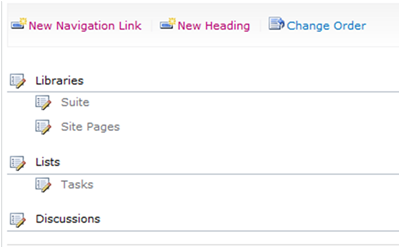
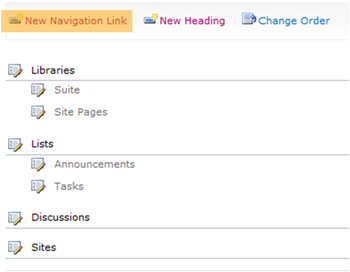
As you can see inside of the Quick Launch manager we can manage the Links, Headings, and Order of content in our Quick Launch. By default there are some which will already exist inside of the Quick Launch. I say this knowing that if you enabled a Blank Site the Quick Launch will actually be empty except with certain headings for each list group.
For our example we will create a link to a site that already exists. Let’s begin, by default unless there is a site being displayed within the Quick Launch there will be no Sites heading so we will need to create one.
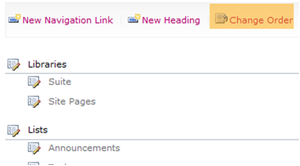
Click on “New Heading”

Because we want to display a list of sites that my users will access, I will enter the following web address.
“/sites/Adam/_layouts/viewlsts.aspx?ShowSites=1”
You of course will want to use your own site URL. Notice how I am using the Parameter “ShowSites” and setting it equal to “1”. This will take the user to the ShowSites view of the All Site Content Page if the user clicks on the Sites Heading. By doing this users will be able to see all sites that exists directly underneath the current site without displaying it in the Quick Launch. There a number of other settings you can use here as well such as;
|
?BaseType=1 |
Show All Document Libraries |
|
?BaseType=0 |
Show All Lists |
|
?BaseType=1&ListTemplate=109 |
Show All Picture Libraries |
|
?BaseType=0&ListTemplate=108 |
Show All Discussion Lists |
|
?BaseType=4 |
Show All Survey Lists |
|
?ShowSites=1 |
Show All Sub Sites |
If the list has been hidden then it will not be displayed. This is different from being displayed in the Quick Launch as lists can be hidden from the browser and only managed via SharePoint Designer. If you are coder you can always modify this file to have more abilities, like displaying all webs there are underneath, but that is for an experienced developer only and should not be attempted by an end user. I have tried to override the ListTemplate to something like 104 for announcements but this is not recognized, so stick with the table above.
Next we need to give our heading a title. Let’s use “Sites” for our title.
Your final result should look like;
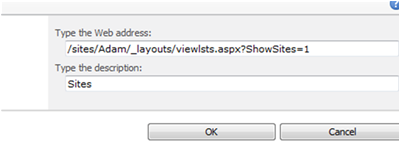
Click the OK button to save your settings. You should now have a new Sites heading. If we did not do this then the next step to actually add the site under the heading would not have been possible since we wouldn’t have a heading to put the site underneath. Look to the left of your page, do you see your new heading?
Now that we have the heading created let’s add a site beneath the heading. Click on “New Navigation Link” to create a new link and place underneath the heading.
Under the “Type the Web address”, type the URL to the site you wish to make available. The site can live anywhere you like as you can use any link provided it is valid URL. (It doesn’t have to be a valid page just a valid URL.) You can add JavaScript here if you like however there could be a negative reaction if you do so since the JavaScript will be added to the HREF attribute. In my case I am adding the URL to my sub site.
Enter the description of the URL. In my case I am using the Name of my site.
Finally choose the Heading you would like the new link to live underneath.
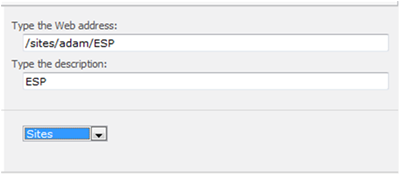
Once complete click OK and you should see your new link underneath the heading we created earlier.
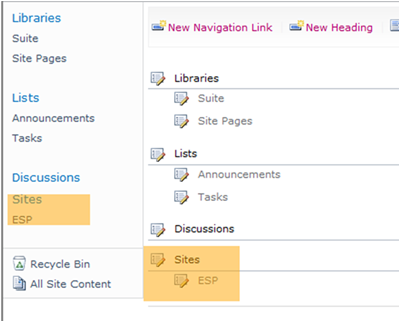
What we want to do now is alter the location where the Heading Sites is located. We want Sites to be at the top. We will now click on “Change Order”
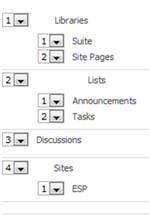
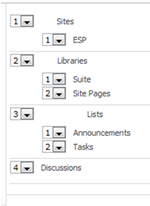
We are now presented with the Change Order Screen. We are given the option to alter the order by choosing the number of the order that we would like the heading to show up in. In our case we want it to be first, so we will select 1 from the drop down next to the Sites heading. Once we make the change the whole view will alter the order for all items.
|
Before
|
After
|
|
|
|
Notice also you have the same option for all sub headings which you can do the exact same process for. So if you have multiple sites you could alter the order of the sites to match to your needs.
Click OK to save your change and look at the Quick Launch bar, did it change?

SharePoint Designer
Using SharePoint Designer we manage if a Site display a Quick Launch, if a List is Display IN a Quick Launch, and control the Quick Launch design. Before we begin you must have Web Designer rights and your Farm/Web Application/Site Collection must allow the use of SharePoint Designer. If are you are not allowed to use SPD then you will be presented with an error message indicating that. Talk to your Administrator about attaining the appropriate rights.
Display Quick Launch in a Site
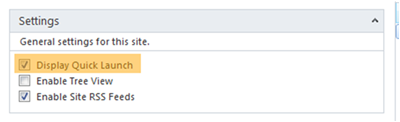
When you open SharePoint Designer to a site for the first time, the first Site Management screen gives you multiple navigation options. One of them is “Display Quick Launch” under the settings panel. Check this option to display the Quick Launch and uncheck to not display it. Make sure you click save to save your changes.
Display List in Quick Launch
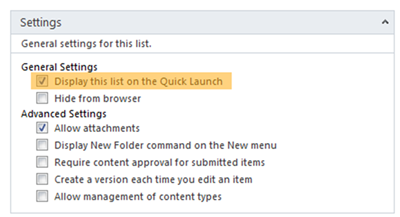
Once you open a list within SharePoint Designer the List Management screen gives you the option to hide or show the list within the Quick Launch. Check the “Display this list on the Quick Launch” to display the list within the Quick Launch and uncheck it to not. Make sure you click save to save your changes.
Modify the Quick Launch Design – the v4.Master
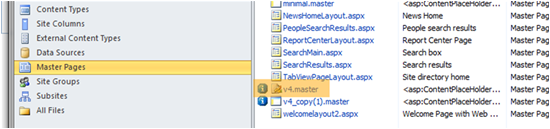
We have seen that we manage our Headings and Links in the Quick Launch from within the browser, but how do we modify the design. We can do so from SharePoint Designer. Locate the Master Page “v4.master” within the Master Pages navigation group. Before we modify this note that a new version of the master page will be created each time you save the file so you do not have to save a copy of the file as you will be able to return to a previous version if necessary.
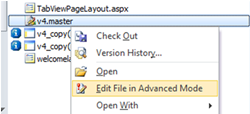
Right mouse click on the v4.master page and choose “Edit File in Advanced Mode”.
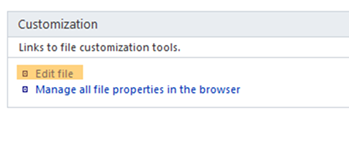
You can also edit the file by clicking on it and then clicking “Edit File” in the management screen.
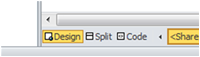
We will now manage some of the properties of the navigation. If you are viewing HTML code right now, you’ll need to get into the Design View. On the bottom of your SharePoint Designer select “Design”.
You are now ready to manage the Navigation. Left mouse click over the Quick Launch bar.
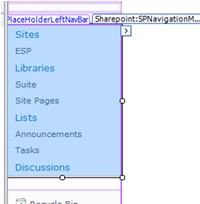
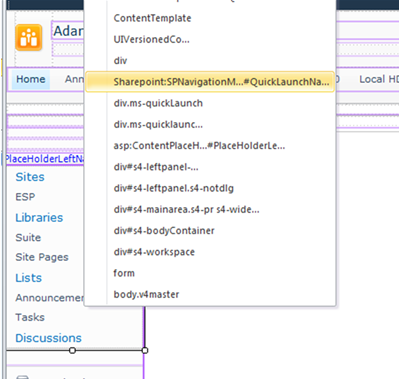
By default, when we click on the Quick Launch we are actually managing the ASPMenu object which is not the object we should manage. We need to manage the SharePoint.SPNavigationManager. There are three ways to get to this.
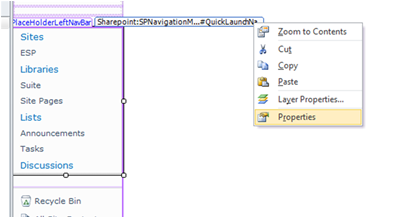
- You can right mouse click on the Object Name above the Quick Launch and choose properties. This will open the Tag Properties for that object. In this case I right mouse clicked on “SharePoint:SPNavigationM…#QuickLaunchNa” and chose properties.
- You can double click on the Object Name within the Tag Viewer at the bottom of your Designer screen. This will open the Tag Properties for that object.
- Click on the “View” tab in the ribbon and drop down the “Task Panes” option. Choose Tag Properties. Your Tag Properties Pane should now be open.
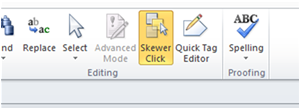
- Now click on “Skewer Click” in the ribbon.
- Move your mouse over the Quick Launch and left mouse click. Select the SharePoint:SPNavigationManager object. This will select the correct object and display its properties in the Tag Properties task pane.
Now that you have properties visible for your Navigation object let’s enable the Quick Launch so that we lock the height and enable the vertical scrollbar. The height we will use will purposefully be short so that we see the scroll bar activate. You can of course set this to any option you wish but this will stop the long scrolling page should you have a lot of sites, lists, and libraries displayed in your Quick Launch.
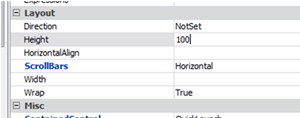
In the Tag Properties, locate the “ScrollBars” property under the group “Layout”. If you would you prefer to sort the properties alphabetically please by clicking on the Sort Icon at the top of the pane.
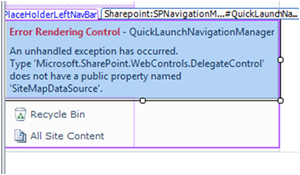
In the ScrollBars property choose “Vertical”. This will turn the scroll bars on for you. After you make the change, in your design view you will see the following error message. Ignore it, you are still doing a great job.
Let’s edit the Height property which is under the same property group. Set the height to “100px”.
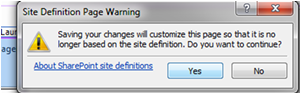
Now that you have completed the change, save your page. You will be presented with the message “Saving your change will customize the page…”. This is just indicating that you modifying the page and it will become unghosted which means that it will no longer use the file on the server as the base page for its design but instead will store the page directly into the Database. Click OK to continue. You can always return the page back to the Site Definition by right mouse clicking on the file and choosing “Reset to Site Definition”.
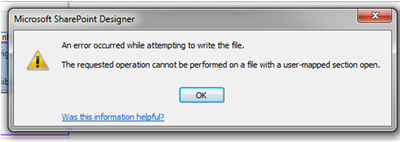
You may also see an error message “The requested operation cannot be performed on a file with a user-mapped section open.” Click the OK button and then wait. Once it comes up with the file dialogue box, hit your escape button. When back on the page, hit your escape button again and try to save. By hitting escape you remove focus from the control causing the problem. Hitting escape before saving will usually keep this error from happening because you will no longer be editing the properties of user object.
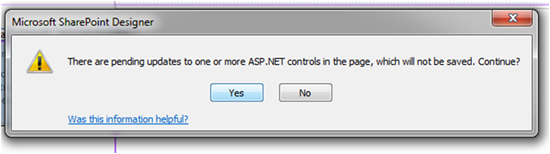
You may also see the error message “There are pending updates to one or more ASP.NET controls in the page…”. Choose no, return to your properties, delete the height entry and re-add it. Now try to save your page again. If the same message occurs, click yes. Open the page back up and go back to the properties. Add the properties that were not added before and save your page.
The final results should look like this;
As you can see the Quick Launch is locked to 100px height and is showing a Vertical Scroll bar. Now your page won’t go crazy when you have 50 lists inside of your site and you are displaying them within the Quick Launch.
Guest Author: Adam Macaulay
Adam Macaulay is responsible for research and development of the technology platform driving the success of CorasWorks products. He has over 15 years of experience developing Internet Applications that have taken internal, cost prohibitive solutions and turned them into profitable internet applications that continue to exist today.

Dude, very thorough, fantastic article, I will be bookmarking this and sharing it with my team.
Great information! Thanks for all the options and warnings about the SPD errors.
Hi,
How can i get the Quick Launch as fly-out menu?
Thanks
husso
this is great stuff, but how do I hide “All Site Content” in 2010. I am working on a wiki page that I wasnt to use a custom built left nav but with the All Site Content it leaves a pointless link for end users and uses space that I would rather not lose.
Any suggestions?
You can add the content editor webpart to the page.
The content you have to add to the webpart is:
#s4-leftpanel {
display:none;
}
.s4-ca{
margin-left:0px
}
This should hide the complete quicklaunch
In MOSS 2007, I used to be able to create a Heading that doesn’t have a link. How do I do that in SharePoint 2010?
I just want to customize my left nav so it makes sense to my users. The nav links under the headings may or may not even belong to the site.
Thanks for your insight.
If you want headings that do not have a link, you will have to enable the publishing feature.
Hello, this is great information, but i do not understand what you mean by enable the publishing feature if l want headings that do not have a link.
Can you send me some more information about this?
Tks
Pilar
Very well presented information Adam.
Thanks.
Hi i want to know that can we have place some web-part just below the quick launch in SharePoint 2010 ? i am new to designing so please help me in this.
Yes, Vipul, it is possible. You can get instructions here:
http://lauracurtis.posterous.com/sharepoint-2010-showing-content-below-quick-l
Thanks for this post, Adam! Very helpful and I’ve got it bookmarked.
Slide Menu – can I change the Quick Launch menu to hide links until I click on the header?
You can display/hide a list in Quick Launch Bar without using the designer.
Site Action -> Site Settings -> Site Library & Lists -> Customize “your list” -> “title, description and navigation”.
Finally choose Yes or No in Navigation section, then OK.
Hi Adam,
Is it possible to create sub-headings in the quick launch menu using SP Designer?
ie
Heading Level1
Heading Level2
Heading Level3
Link to a list/library
Thanks,
Vadim
I have an old 2007 site with publishing enabled and some old pages, i want to convert them to the new wiki page style so that I have more control over positioning. after activating the Wiki Home page and creating some pages, i can’t figure out how to disable the section of the quick launch that show recently modified items. I want to create 10-15 wiki pages and put them in a specific order on the quick launch.Do you have any suggestions?
Adam,
This is one of the best articles I’ve read on modifying the SP 2010 Quick Launch! Thanks for providing a very informative article to the rest of the SharePoint user community.
Great job!
Hi,
great article, but I’m working on a new intranet solution with 2010 Foundation. What I have recognized, is that when I create a web part page, the quick launch is not there. I have no choice to create a page (without content) but keep the quick launch from the parent site. How can I manage to have the quick launch still?`
Also, when I create the WIKI, it shows me always the menu “recently modified”. How can I remove this?
Thanks in advance,
Ron
Hi Friends,
I have a share point website. When i click on my collection in the list bottom its show Recycle Bin and All site content. But when i click on the Shared Docs its give me one more option for By Folder and By Author just before Recycle Bin.
Can any one tell me how to change the placement on that?? I want that to come in top of the list. I am not able to do that as am not able to see that when i edit master page.
Regards,
Avdhesh
Adam,
Thanks,its an amazing article about modifying the SP 2010 Quick Launch.
it saved me alot of time.